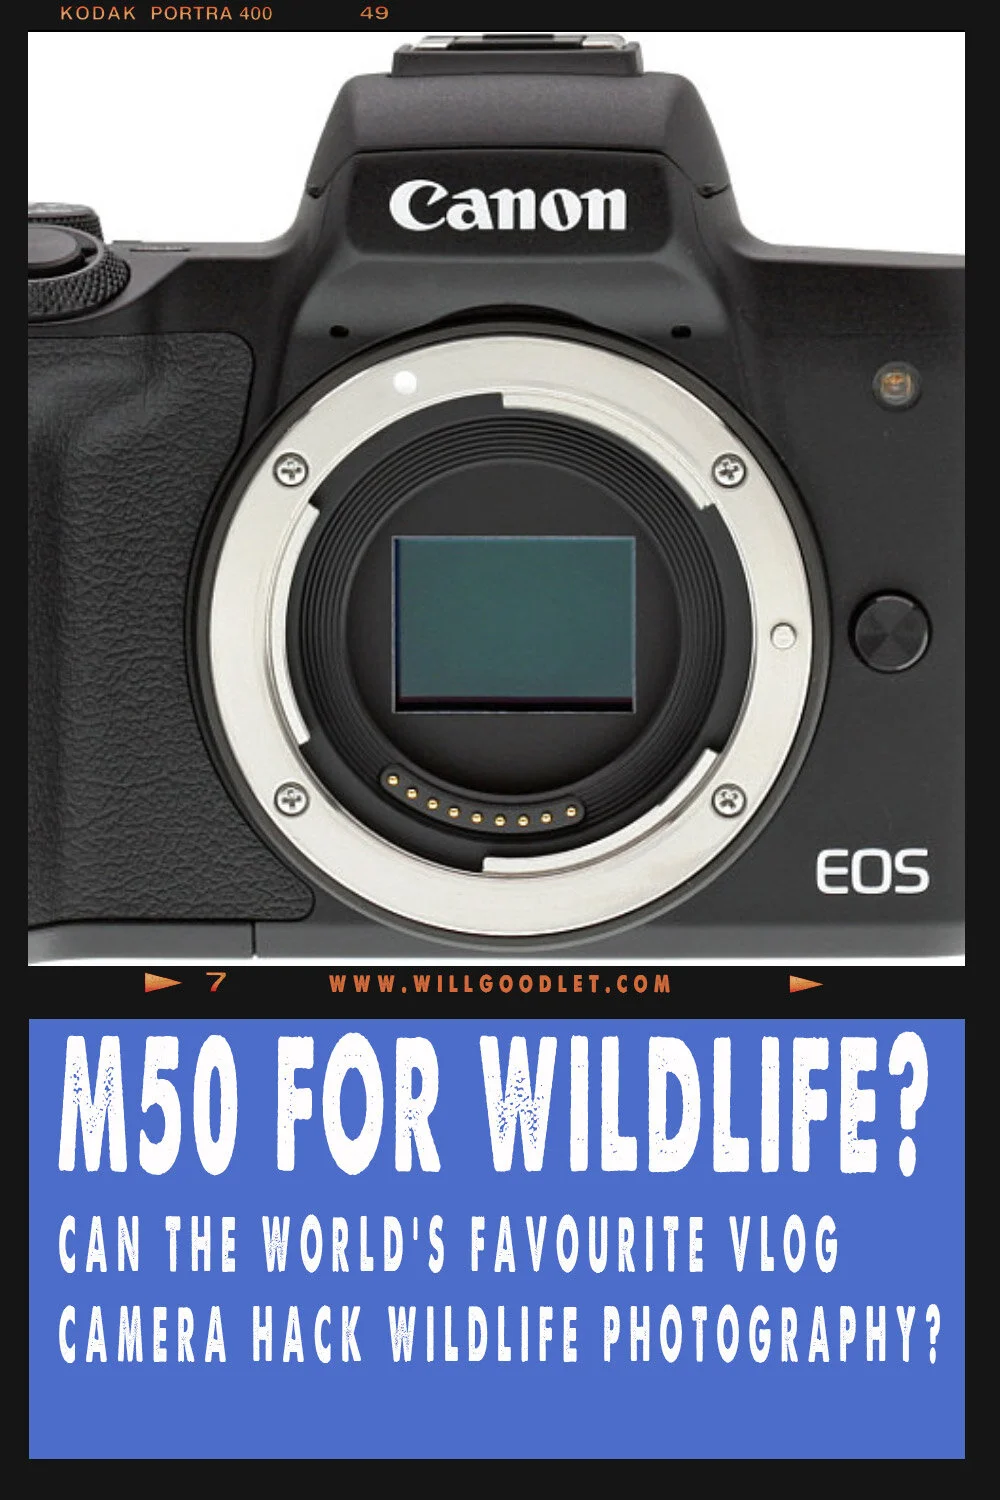
Is the Canon M50 a good camera for wildlife photography?

This website uses affiliate links, meaning: at no additional cost to you, I earn a small commission if you click-through and make a purchase. As an Amazon Associate I earn from qualifying purchases. I only feature products that I believe in and use.
Your support means the world to me and allows me to host this website. Thank you!
Is the Canon M50 a good camera for wildlife photography?
The quick answer is a qualified YES.
But...
Summary
Positives
The Canon EOS M50 is a fantastic camera. We can use it for all forms of nature, bird and wildlife photography. Are there better options out there? Most definitely yes, but at the same price point these will mostly be used DSLR’s.
With the M50’s 24mp APS-C crop sensor, 10 frames per second burst rate, continuous autofocus and 10 frame buffer depth, it can get the job done. More so when you switch to JPG shooting for burst photography.
Add the exceptional video capabilities: 1080p at 60 frames per second and cropped 4K video (ideal for wildlife because of the added reach).
Combined with lightweight and small form factor and you have a simple setup to take with you on safari or just out into the countryside.
For novice users, the electronic viewfinder will make choosing the correct exposure a breeze.
However, as a serious or even semi-serious wildlife stills camera, it has deficiencies.
Negatives
Its petite frame and consumer level build quality means that the M50 feels fragile attached to anything larger than a kit 70-300 lens.
Attaching the M50 to my 400mm F2.8 Mark ii L IS USM felt adventurous. Cameras often get knocked in the excitement of a sighting, and you would have to be very careful with it.
The M50 is not weather sealed. It won’t take kindly to excessive rain or dust in the back of an open safari vehicle or on the side of a moor.
The autofocus is adequate for large animals but not reliable for fast moving small subjects, especially those moving towards you, and it quickly fills the buffer.
PROS
Good image quality and resolution
4K Crop video is a positive
Exceptional video Dual Pixel autofocus up to 1080p 60
10FPS (7.4 FPS with continuous autofocus)
Flip out touch screen
Built-in Electronic Viewfinder
Touch and Drag Autofocus
Small form factor means it is easy to pack
Buttons can be re-mapped
149 or 99 Point autofocus covering up to 88% of the frame width
Face tracking works for some species
CONS
Poor autofocus for moving subjects (vs. DSLR)
RAW Buffer fills in 1 second
Feels fragile and small in hand
Very Slow AF point Movement with buttons
Weather Sealing inadequate
Short battery life
Eye-AF works mainly on humans (only sometimes animals)
CHECK PRICES
How I Use the Canon M50
Vlogging and Video
I bought the M50 for making wildlife photography vlogs. I equipped it with an EF-M 11-22mm lens and it performs this role flawlessly.
It’s only really been since the start of lockdown that I have decided to even try the camera for stills, let alone wildlife or bird photography. When an M50 shares shelf space with heavyweight pro-level DSLR’s it is rarely used in preference for wildlife stills!

As already mentioned the video capabilities of the M50 are very good. It is the one area besides its lower weight where it competes with (and kind of beats) my DSLR’s.
So I gave the little camera a shot on the bigger L lenses. The Canon 100-400mm F4.5-5.6 L IS USM ii, the Canon 400mm F2.8 L IS USM ii, EF 1.4x iii and EF 2.0x iii.
Advantage of 4K Crop Factor
In video mode, I can flip between 1080p 50fps and 4k 25fps. This is the one time where cropped 4K video is an advantage.
For distant birds and wildlife, the crop brings the frame tighter around the subject without the need to crop in and lose quality in post.
Electronic Viewfinder (EVF)
I need reading glasses these days. It’s the worst thing about turning 40+! I can no longer see what’s in focus on my DSLR LCD screens, which makes them very difficult to use for video.
The EVF on the M50 is good and makes it much easier to judge both focus and exposure when shooting video. In fact, because it has a built in viewfinder, I prefer it to newer models like the M6 ii.
However, compared to an optical finder the shadows and highlights are compressed and it can become very hard to see into the shadows.
For me, this is not ideal because a lot of the reason for being a wildlife photographer is the simple enjoyment of watching animals. Watching them through an optical viewfinder is infinitely preferable to watching them through the M50.
Having said that, the M50 is not bad by mirrorless standards.
Stills wildlife and bird photography with the Canon M50
If I want to take a stills image, all I need do is turn the mode dial. That the M50 still has an actual mode dial is also an excellent feature. There is nothing worse than having to dive through a bunch of menus to change configuration when in the middle of a sighting.
The M50 isn’t faultless here; it doesn’t have any custom shooting modes, for example, so I cannot set it up to have different video settings for slow motion, or a dedicated mode for slow shutter panning like more professionally orientated bodies.
The camera will keep the settings separate in each mode, so video will keep a fixed shutter speed and not require resetting when returning from another mode.
Like all Canon cameras, the internal menus are excellent and it is possible to set up custom menus visible in the EVF (unlike DSLR’s). So there are ways to change settings without taking your eye from the viewfinder.
Button Assignments
It’s also possible to customise the functions of most of the buttons. Setting the camera up to behave more like my DSLRs is important for me.
With the smaller form factor and differences in button placement, it can be very difficult to shift between shooting on the M50 and a DSLR. While few people will have this problem, it is a significant issue for many wildlife photographers because they routinely use more than one body.
Ergonomics
As a pure stills camera, the M50 has some issues and of these the dominant one is ergonomics. It is too small on the end of the big lenses, so you cannot risk picking the body up and placing any stress on the lens mount.
It’s also important to point out that these heavy lenses (the 400 f2.8 is close to 4KG) require the EF to EF-M adapter to mount and it’s another point of flex and weakness.

Canon EOS M50 - Back View
Using the Canon EOS M50 with EF Lenses
The Canon EOS M50 works very well with EF and EF-S lenses via the EF-EFM adapter.
Focus is reasonably fast and accurate, but it is not as fast as a DSLR. It also becomes noticeably sluggish in low light. Unlike the higher-end APS-C DSLR’s there is no way to customise autofocus significantly.
I found the M50 focused significantly faster and more accurately on the 400mm f2.8 vs the 100-400mm F4.5-56.
The ability of the M50 to attach to EF lenses is arguably one of its greatest features and mostly, I feel that the implementation is very good and usable for all but faster-moving subjects.
I use the M50 mainly for video with EF lenses. The autofocus is smooth and slow, perfect for video. The software image stabilisation works reasonably, particularly at 1080p and produces nice smooth footage. The Image Stabilisation built into many EF lenses also assists.
If you are accustomed to using L series EF lenses with DSLR's you will not find the M50 as capable. Not by a long shot. But it is useful as a backup camera, a stills camera for wider angles and as a dedicated body for video.
Because conditions are dusty on safari, I am reluctant to change lenses in the field. Using the M50 for vlogging, video and wide angle stills means I need not change lenses on the wildlife dedicated DSLR’s.

Canon EOS M50 - Top View
Canon M50 Autofocus Modes
Eye AF
The M50 has Eye-AF for still shooting and one-shot AF mode only. In my tests it worked well on humans and sometimes on the paler of my two dogs. Picking up the darker eye patch, no doubt.
Face Tracking
The M50 also has a Face Tracking mode, which worked for both people and sometimes my dogs. It was not always reliable for animals (it wasn’t designed to be) but it can be very useful when shooting.
Zone AF
The Zone AF system works by tracking larger parts of the body and may attach to any part. This means that the eye is not always sharp in this mode. Using Zone AF is appropriate for smaller subjects like birds, but inappropriate for larger ones. Point AF is preferable and more accurate.
Point AF
Point AF is the most accurate. You can move the point around the viewfinder in two ways. Using the touch and drag feature on the LCD (much faster) or, if your nose is accidentally moving the point, you can turn that off and use the multi-function controller - this is vastly slower.
Servo AF
The M50 supports Servo AF, so it can continuously track a subject as it moves through the frame. This is crucial for wildlife photography and videography. It works pretty well mostly but breaks down on fast subjects or when the subject is moving straight towards the photographer.
I should also note that the tracking becomes less reliable the closer you are to the subject and more reliable at a medium distance. This is true of all cameras.
Customisation
There is no way to customise the speed or stickiness of the autofocus system as you can on the more expensive DSLRs.
Back Button Focus on the Canon M50
The ability to customise the buttons on the M50 is useful. The closer I can get this camera to the functionality of the other two cameras, the better. This is so I can pick one up and use it without having to think too much in the heat of the moment.
One feature I like is Back button focus. For those that don’t already know, this is a favourite technique amongst many wildlife photographers.
Basically, it disassociates the focus and shutter controls so they can be used separately. The Shutter button is used only for taking the shot and the back button is used to focus the camera.
There’s plenty of info about using back button focus, so I won’t go into it here, but if you like using the technique, fear not. The M50 can do it too!
However, in my tests I found that moving the focus point with the right thumb was more important and, as the thumb cannot be in two places at once, I disabled back button focus and reverted to more traditional shutter button focusing.
I am also interested to see if I can use a touch and drag focus point with the touch shutter. I have not yet tried this.
Stills Image Quality on the M50
Stills images from the Canon M50 are excellent, no worse than any other Canon APS-C and better than the older ones. Being a crop sensor camera, it is more sensitive to noise in general but the image quality is comparable.
ISO is an important value for wildlife photographers shooting in poor light conditions and while the M50 will never be a rockstar in this department, it compares well with other APS-C cameras.
It delivers good usable files at a relatively high ISO of 3200. Pushing it much further than this will require more aggressive noise reduction in post processing, but these days, software can rescue even very noisy images.
Canon EOS M50 - ISO 800
Canon EOS M50 - 100 percent crop ISO 800

Canon EOS M50 - 100 percent crop ISO3200
Conclusion
The M50 is a versatile camera. It can do just about anything and may even perform better with it’s own system lenses than attached to EF monsters. In fact it probably does. I also think the EF-S lens format would be ideal for these cameras.
But while I have no hesitation in recommending it as a vlogging camera (it is excellent) and a versatile travel camera I would never recommend it as a main body for wildlife. At least, I wouldn’t recommend it for someone wanting to go further with wildlife photography.
What I mean by that, is that if you see yourself progressing wildlife as a passion - there are better ways to go. Ways that will allow you to grow. The M50 won’t do that. It will do just about enough to get a shot and that’s where it stops.
It’s key downfall for serious wildlife photography is the autofocus. It’s just not quick enough for small subjects. Beyond that its has poor handling. In my hands it is just too small, the buttons too hard to reach (particularly the AF stop and focus point buttons on the right hand side of the chassis) and the build too flimsy.
If you just need a backup camera, or a small camera to take hiking or pack into tight spaces and don’t want to spend a little more, then the M50 is not a bad choice. Especially when you calculate the versatility of being the only Canon format able to mount EF-M, EF-S and EF lenses.
If you are looking to add video content but don’t want to spend a fortune, the M50 is capable of delivering in spades.
If you want great shots of animals and birds and you want to go further then consider some of the second hand options for the same price.
My advice would to be reserve 80% of your budget for a good lens and 20% for a body. In a year or two you will have replaced the body but the lens may very well stay with you for many years to come.
Canon M50 Specifications
24MP APS-C CMOS sensor
EF-M lens mount with support for EF/EF-S lenses with optional adapter
Dual Pixel autofocus for stills and 1080p video
DIGIC 8 processor
2.36M-dot OLED EVF
1.04M-dot vari-angle LCD
7.4 fps burst in AF-C (10 fps in AF-S)
4K/24p UHD video (1.7x crop)
1080/60p and 720/120p HD video
Wi-Fi and NFC with Bluetooth
235 shot-per-charge battery live (per CIPA)
Canon M50 Wildlife Settings Guide
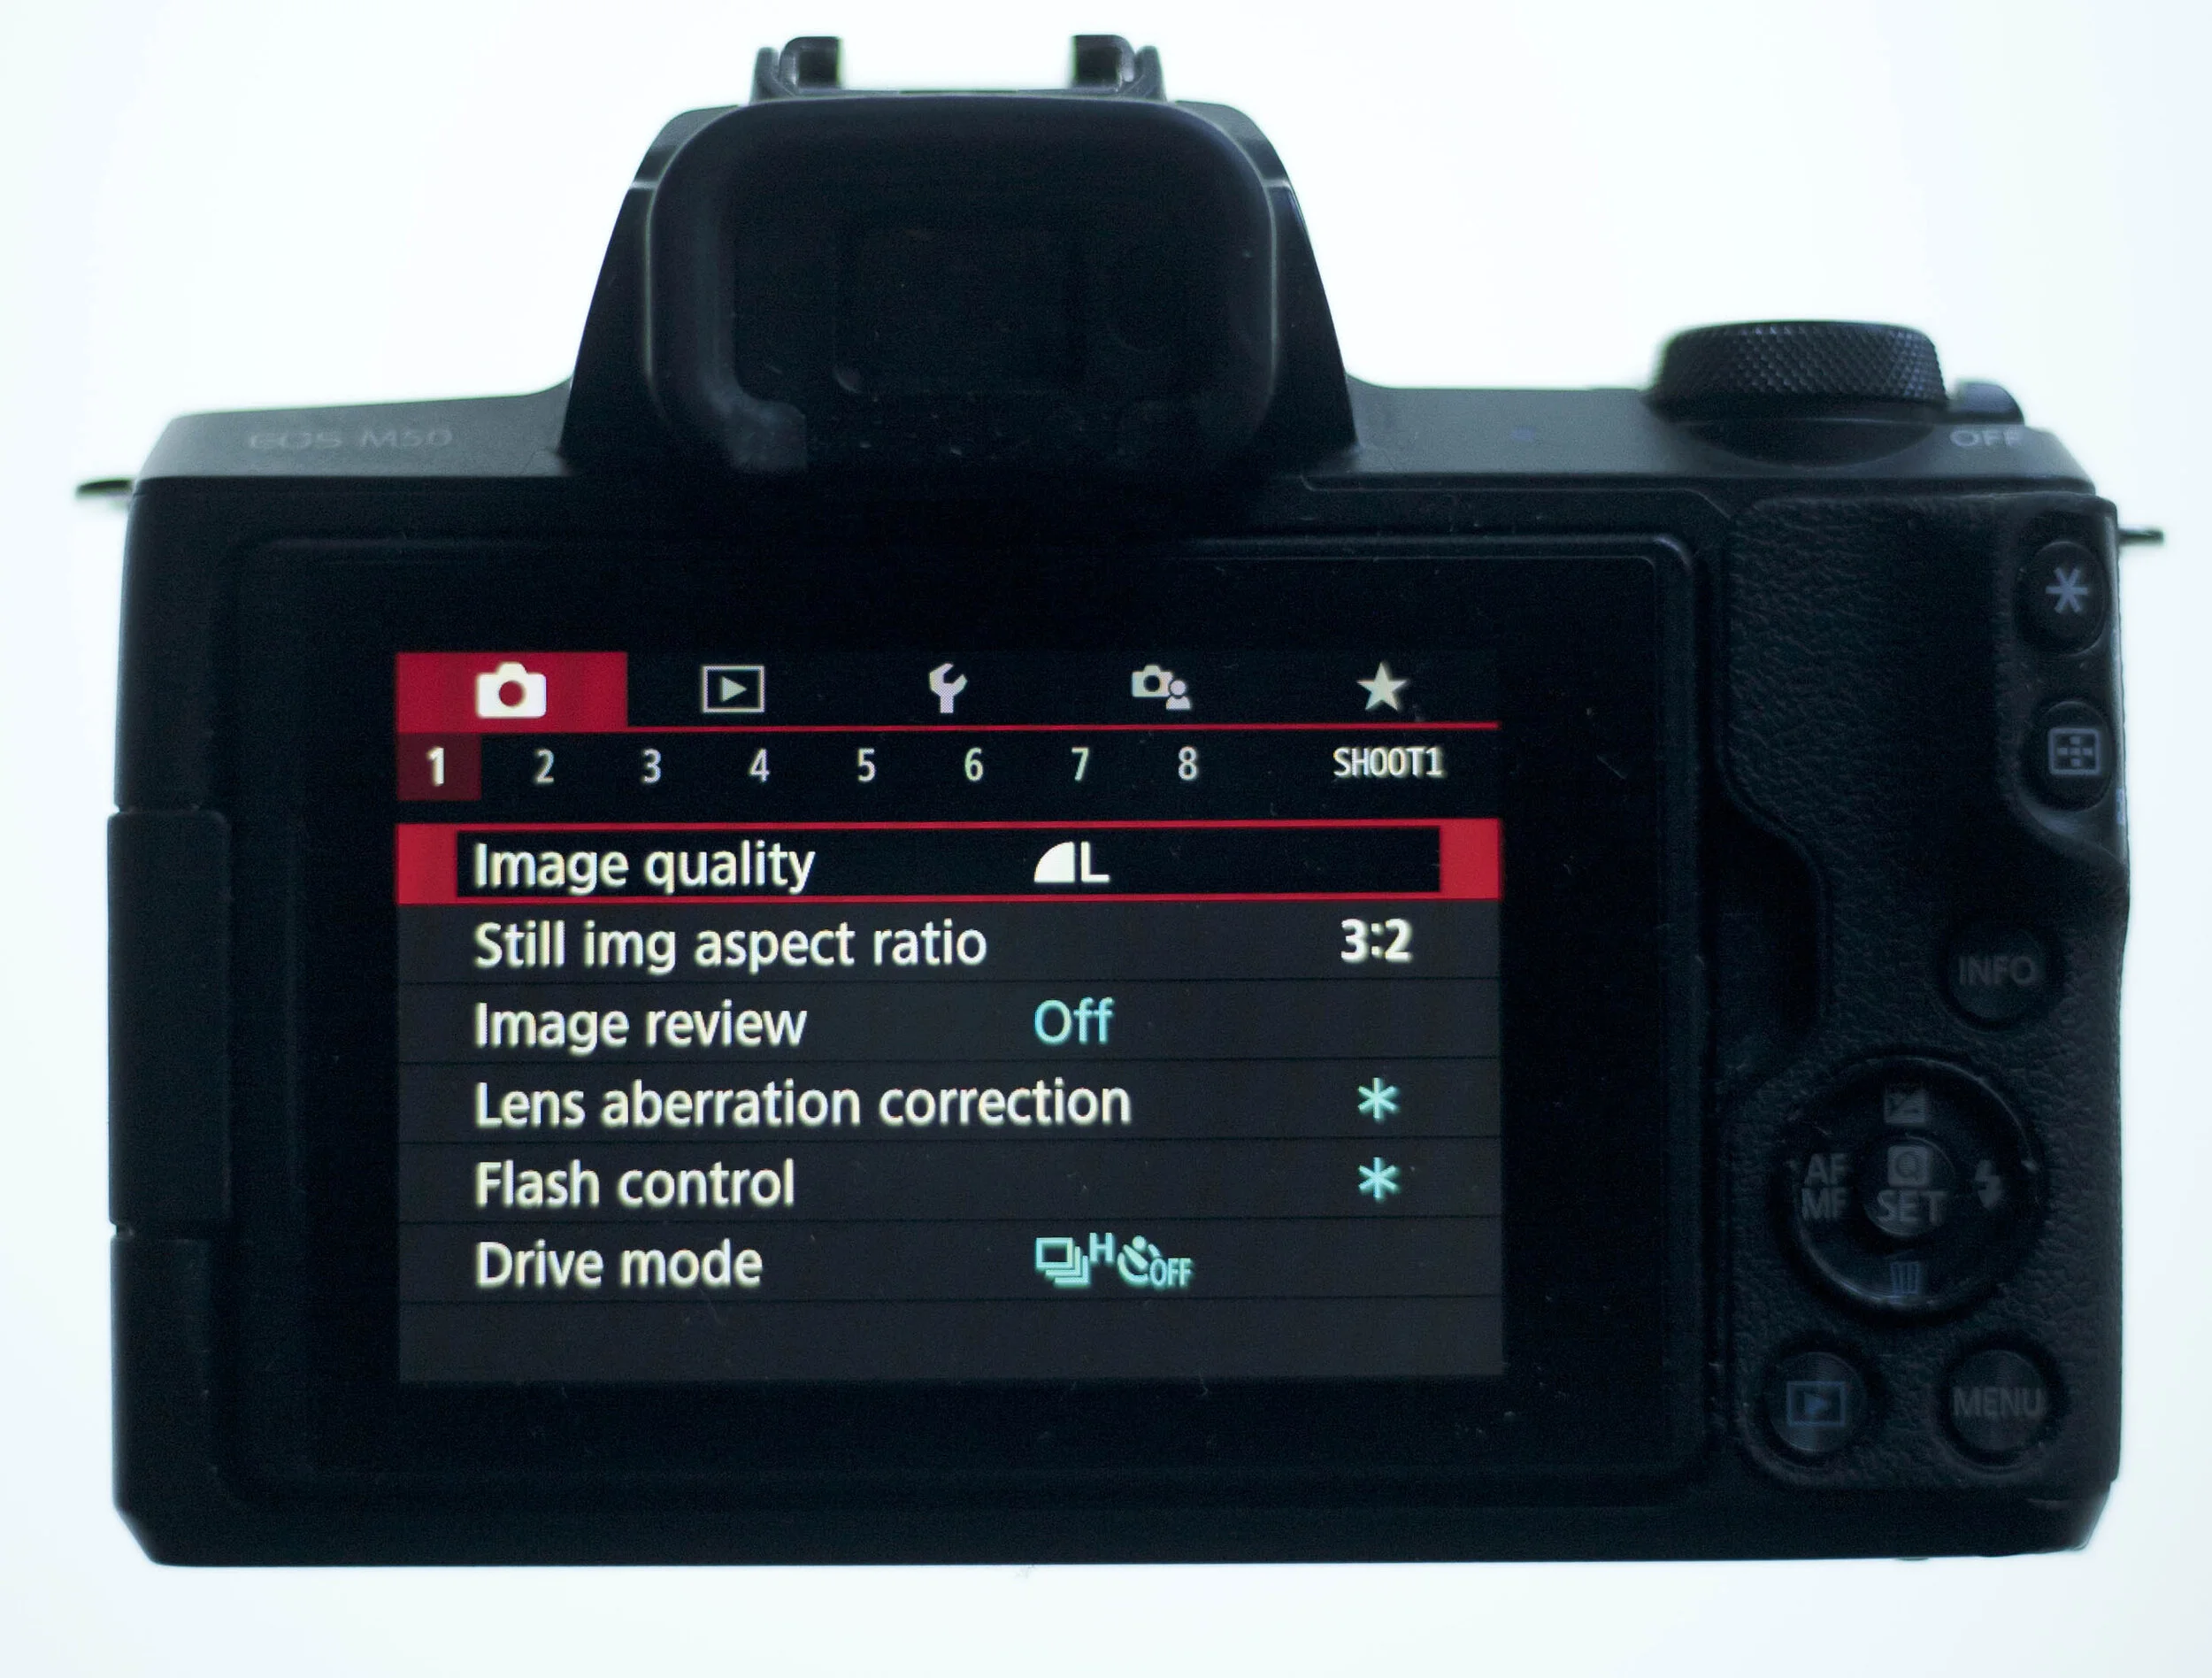
Image Quality
These are the settings that I use at the moment on the Canon EOS M50 for any kind of wildlife, action, bird and sports photography.
You will see that I have switched Image Quality to Large JPG. This is because the buffer for the M50 is rated to only 10 RAW images.
When switched to Large JPG it is 33 shots. This is more usable for action but you need to be very careful to shoot correctly in camera when using JPG files. This is because there is much less latitude for adjustment in post processing.
If your subject is slow, and or you are taking few shots in a burst, I would recommend changing image quality to RAW.
Set Image Review ‘Off’
Turn off image review to stop the image appearing in the viewfinder after the shot. This will make it easier to track subjects through the viewfinder when there is a lot of action.
Drive Mode
Set drive mode to High Speed
Exposure Compensation
It is advisable to shoot wildlife with the histogram biased to the right (brighter) side. This is because shadow information is often hard to recover.
Changing the compensation to the right means that the shadows will be open and less dark. You can correct this in post processing by making them darker or adding contrast.
If, you need to brighten the shadows further on the subject, which is the most usual scenario, there will be less noise as a result and you will get a better image.
Generally, a setting of +2/3 is a good point to start.
Highlight Tone Priority
This setting protects the brightest parts of the image and makes over exposing them less likely.

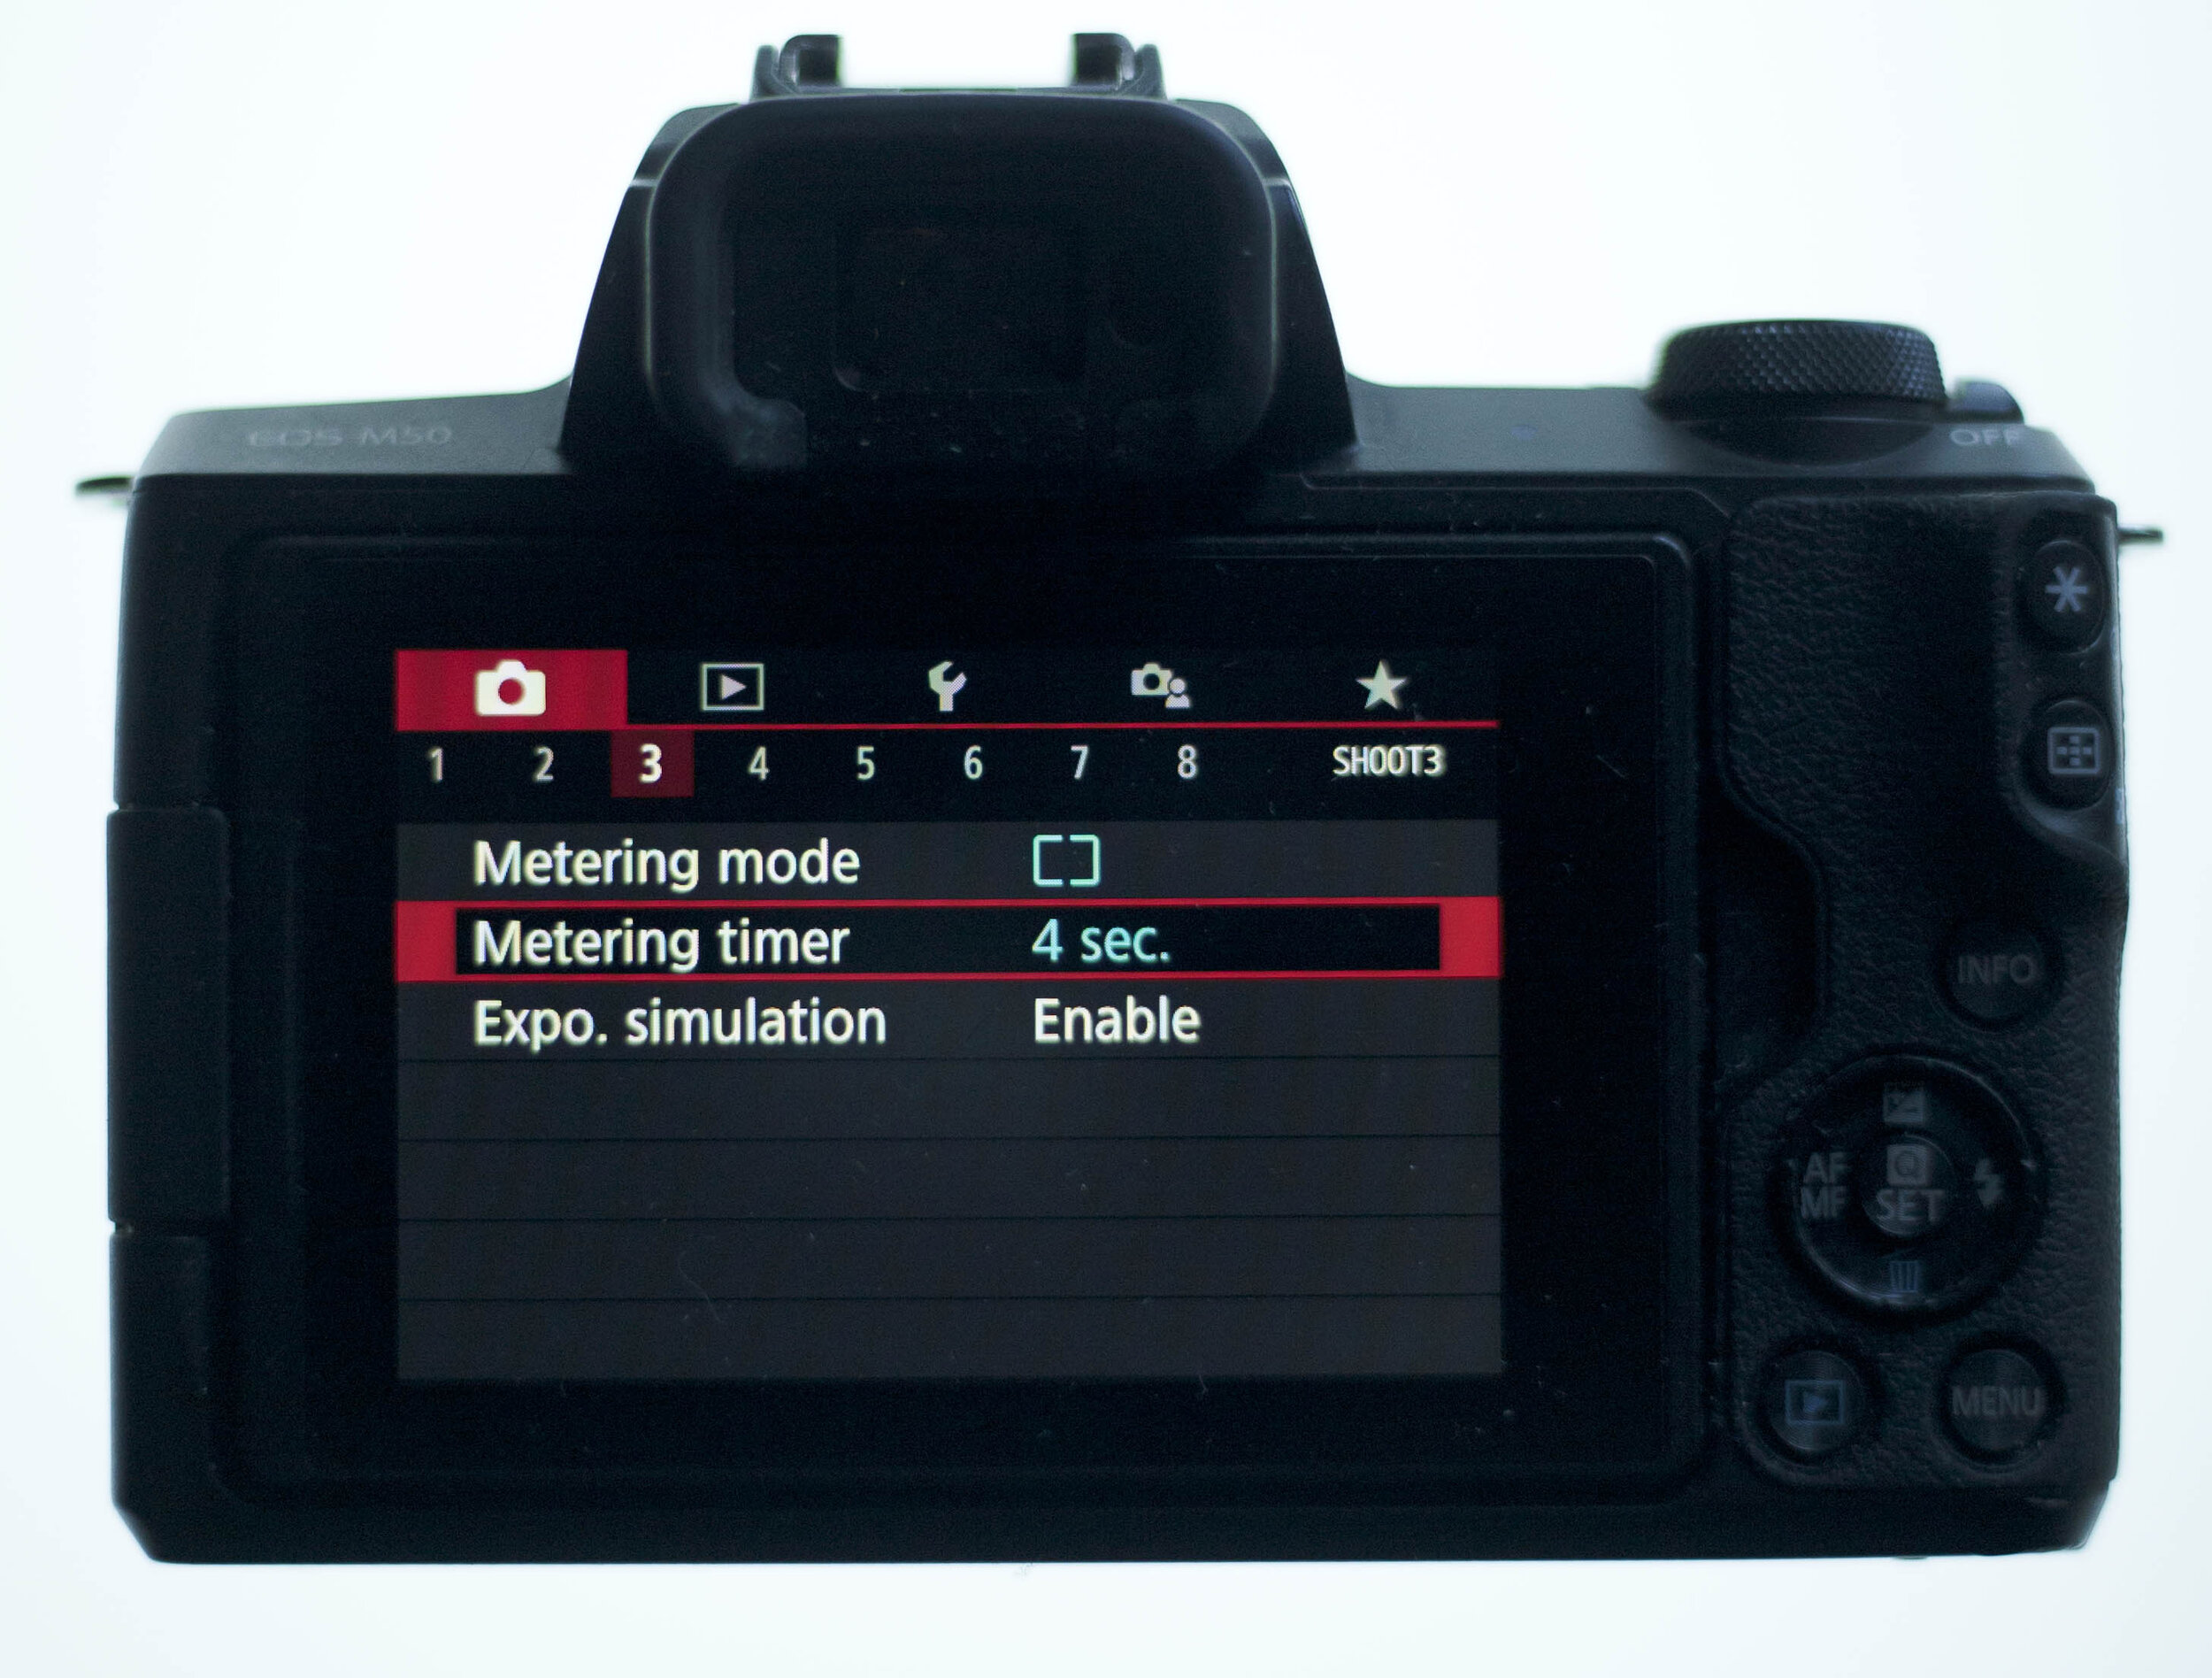
Metering Mode
I generally set my metering for wildlife and birds to ‘centre weighted average’.
I prefer this to spot metering because it is too hit and miss. I rarely use evaluative metering because the background is of far less importance than the subject in terms of the final metered scene.
Of course for bright or dark subjects it may be necessary to over or under expose.
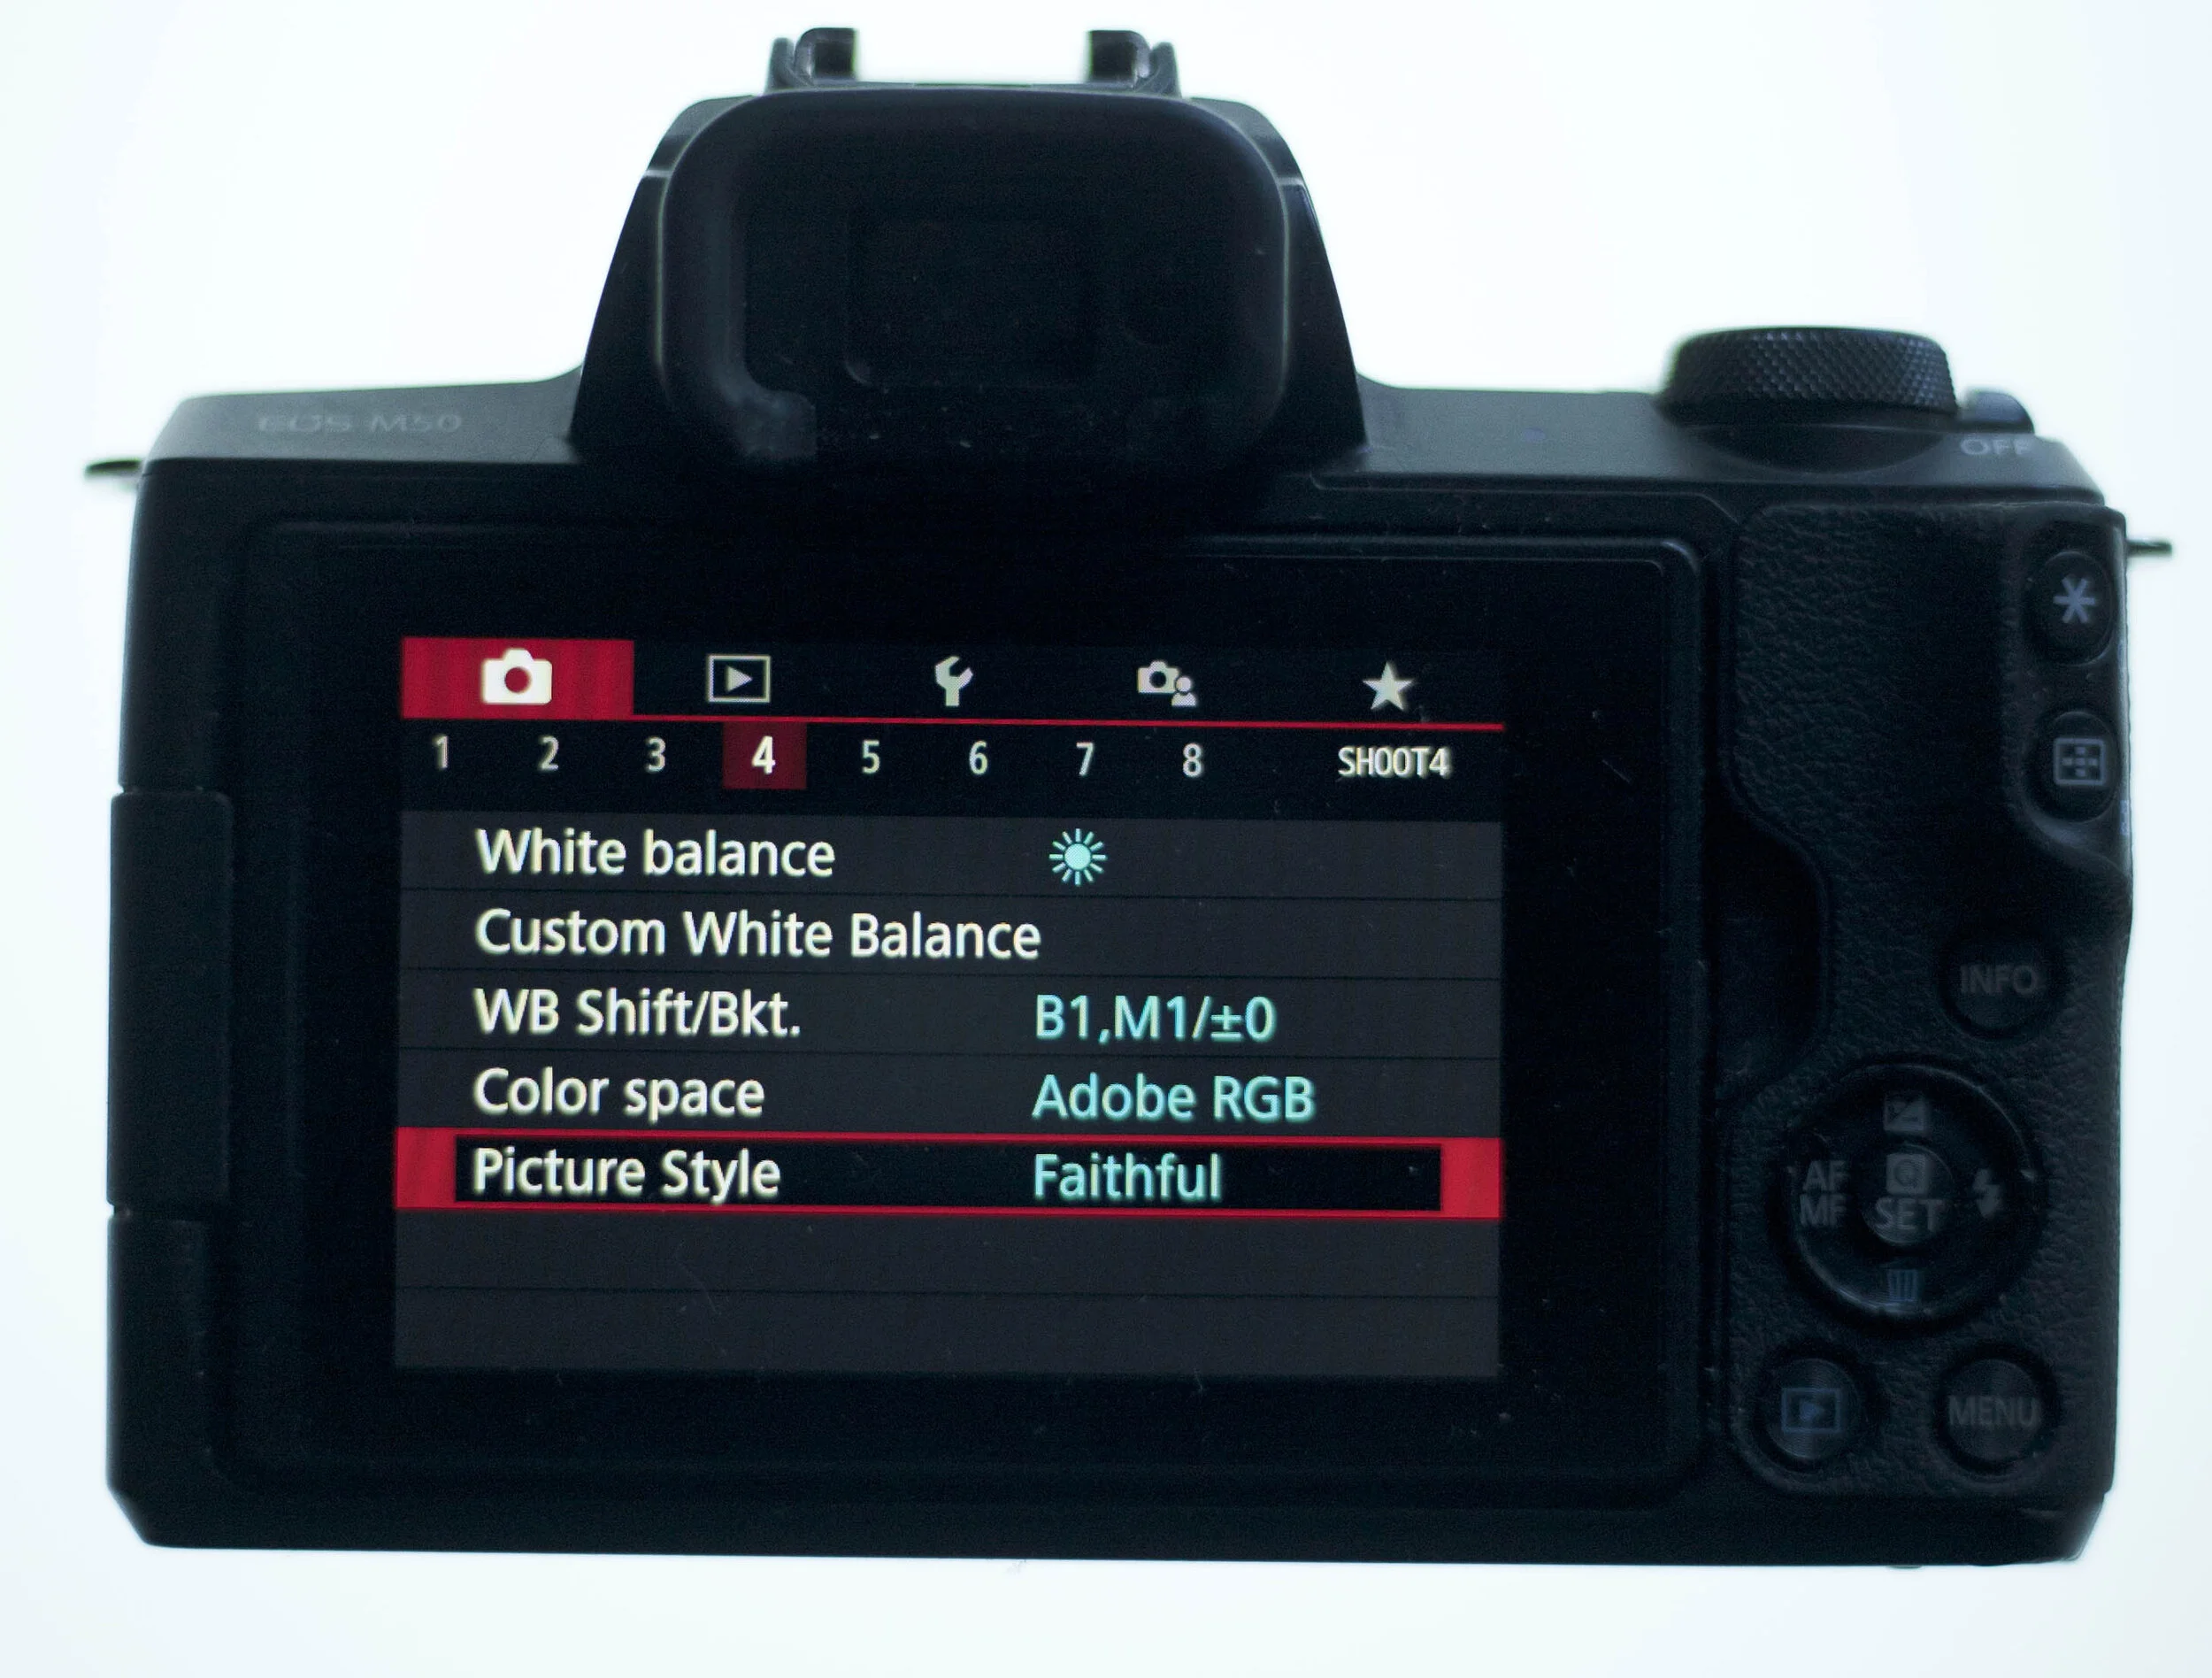
Picture Style & White Balance
If you have set your camera to shoot in JPG for action you must pay very specific attention to the baked in settings.
I would suggest you choose a picture style to apply at capture because this cannot be modified after the fact when shooting JPG.
The same is true for White Balance. I like to set my white balance for the prevailing conditions and then leave it alone.
This makes post processing quicker because the adjustments will always be absolute and not relative to each exposure (as they are on auto white balance).
If you are shooting RAW, then these settings can be adjusted later on in post processing.
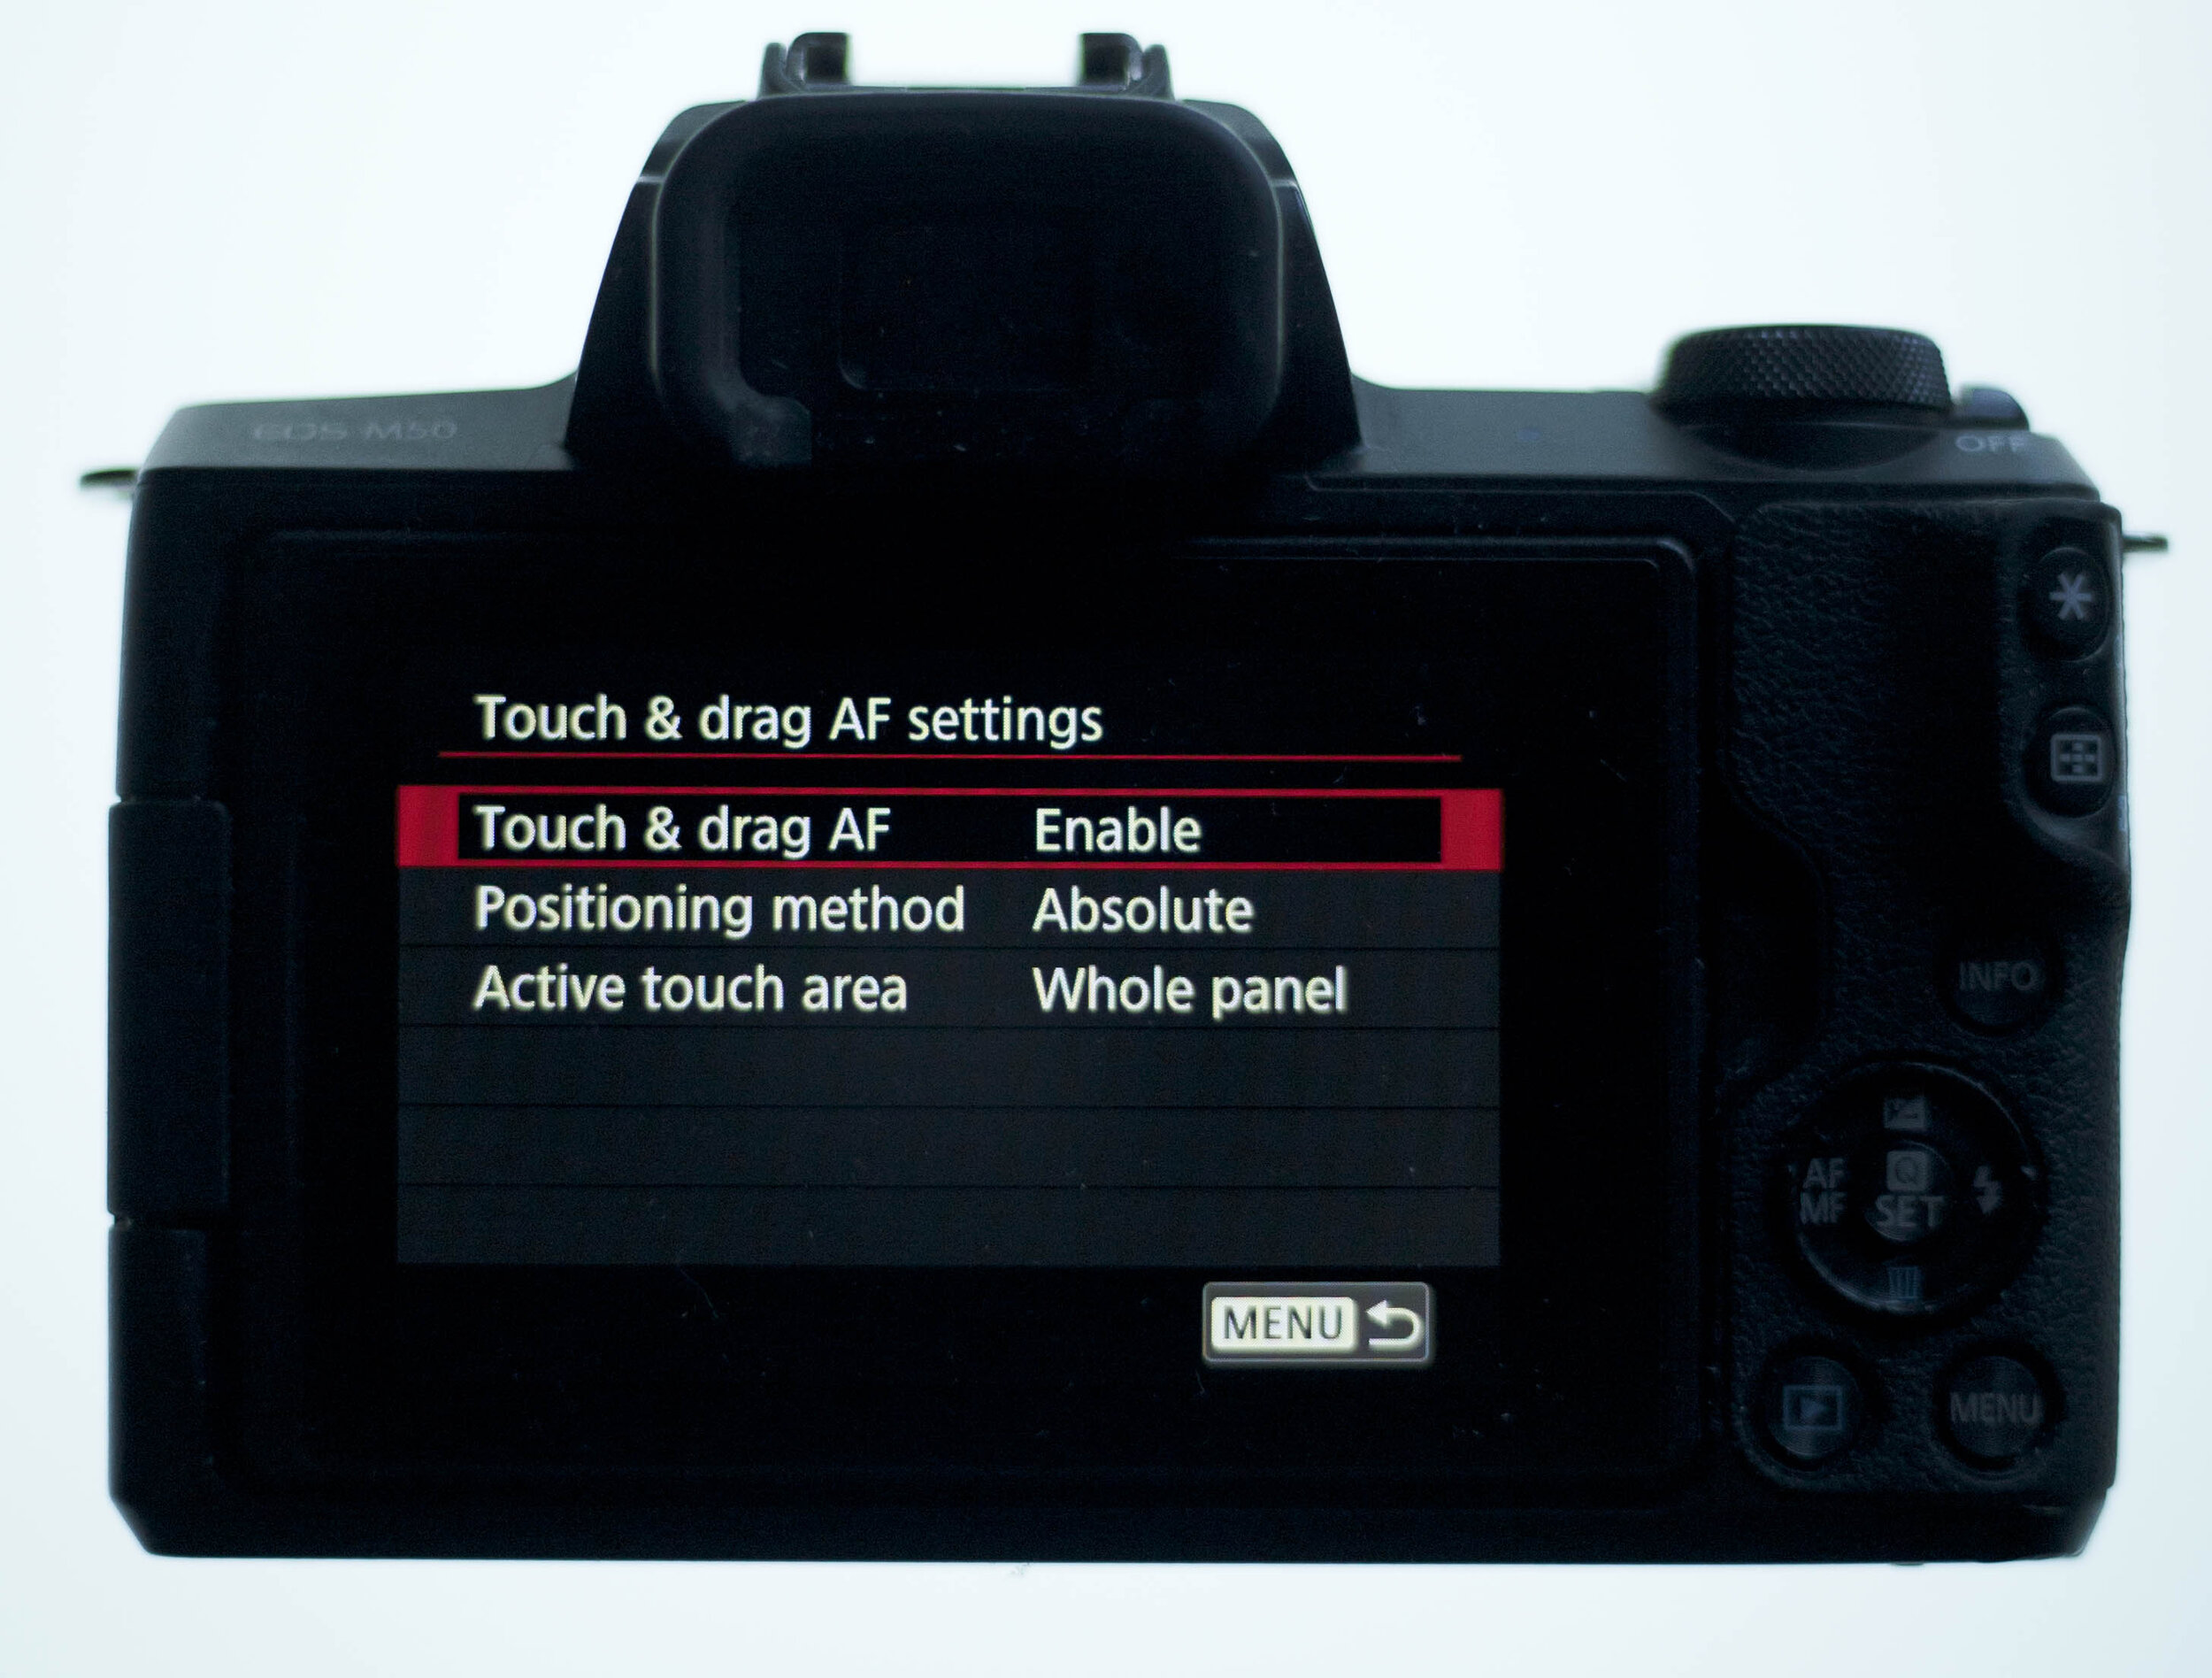
Touch and Drag Settings
Turn touch and drag ON to allow fast focus point selections.
Use the Touch and Drag sub menu to choose your preferred settings. Mine are shown in the screenshot below.

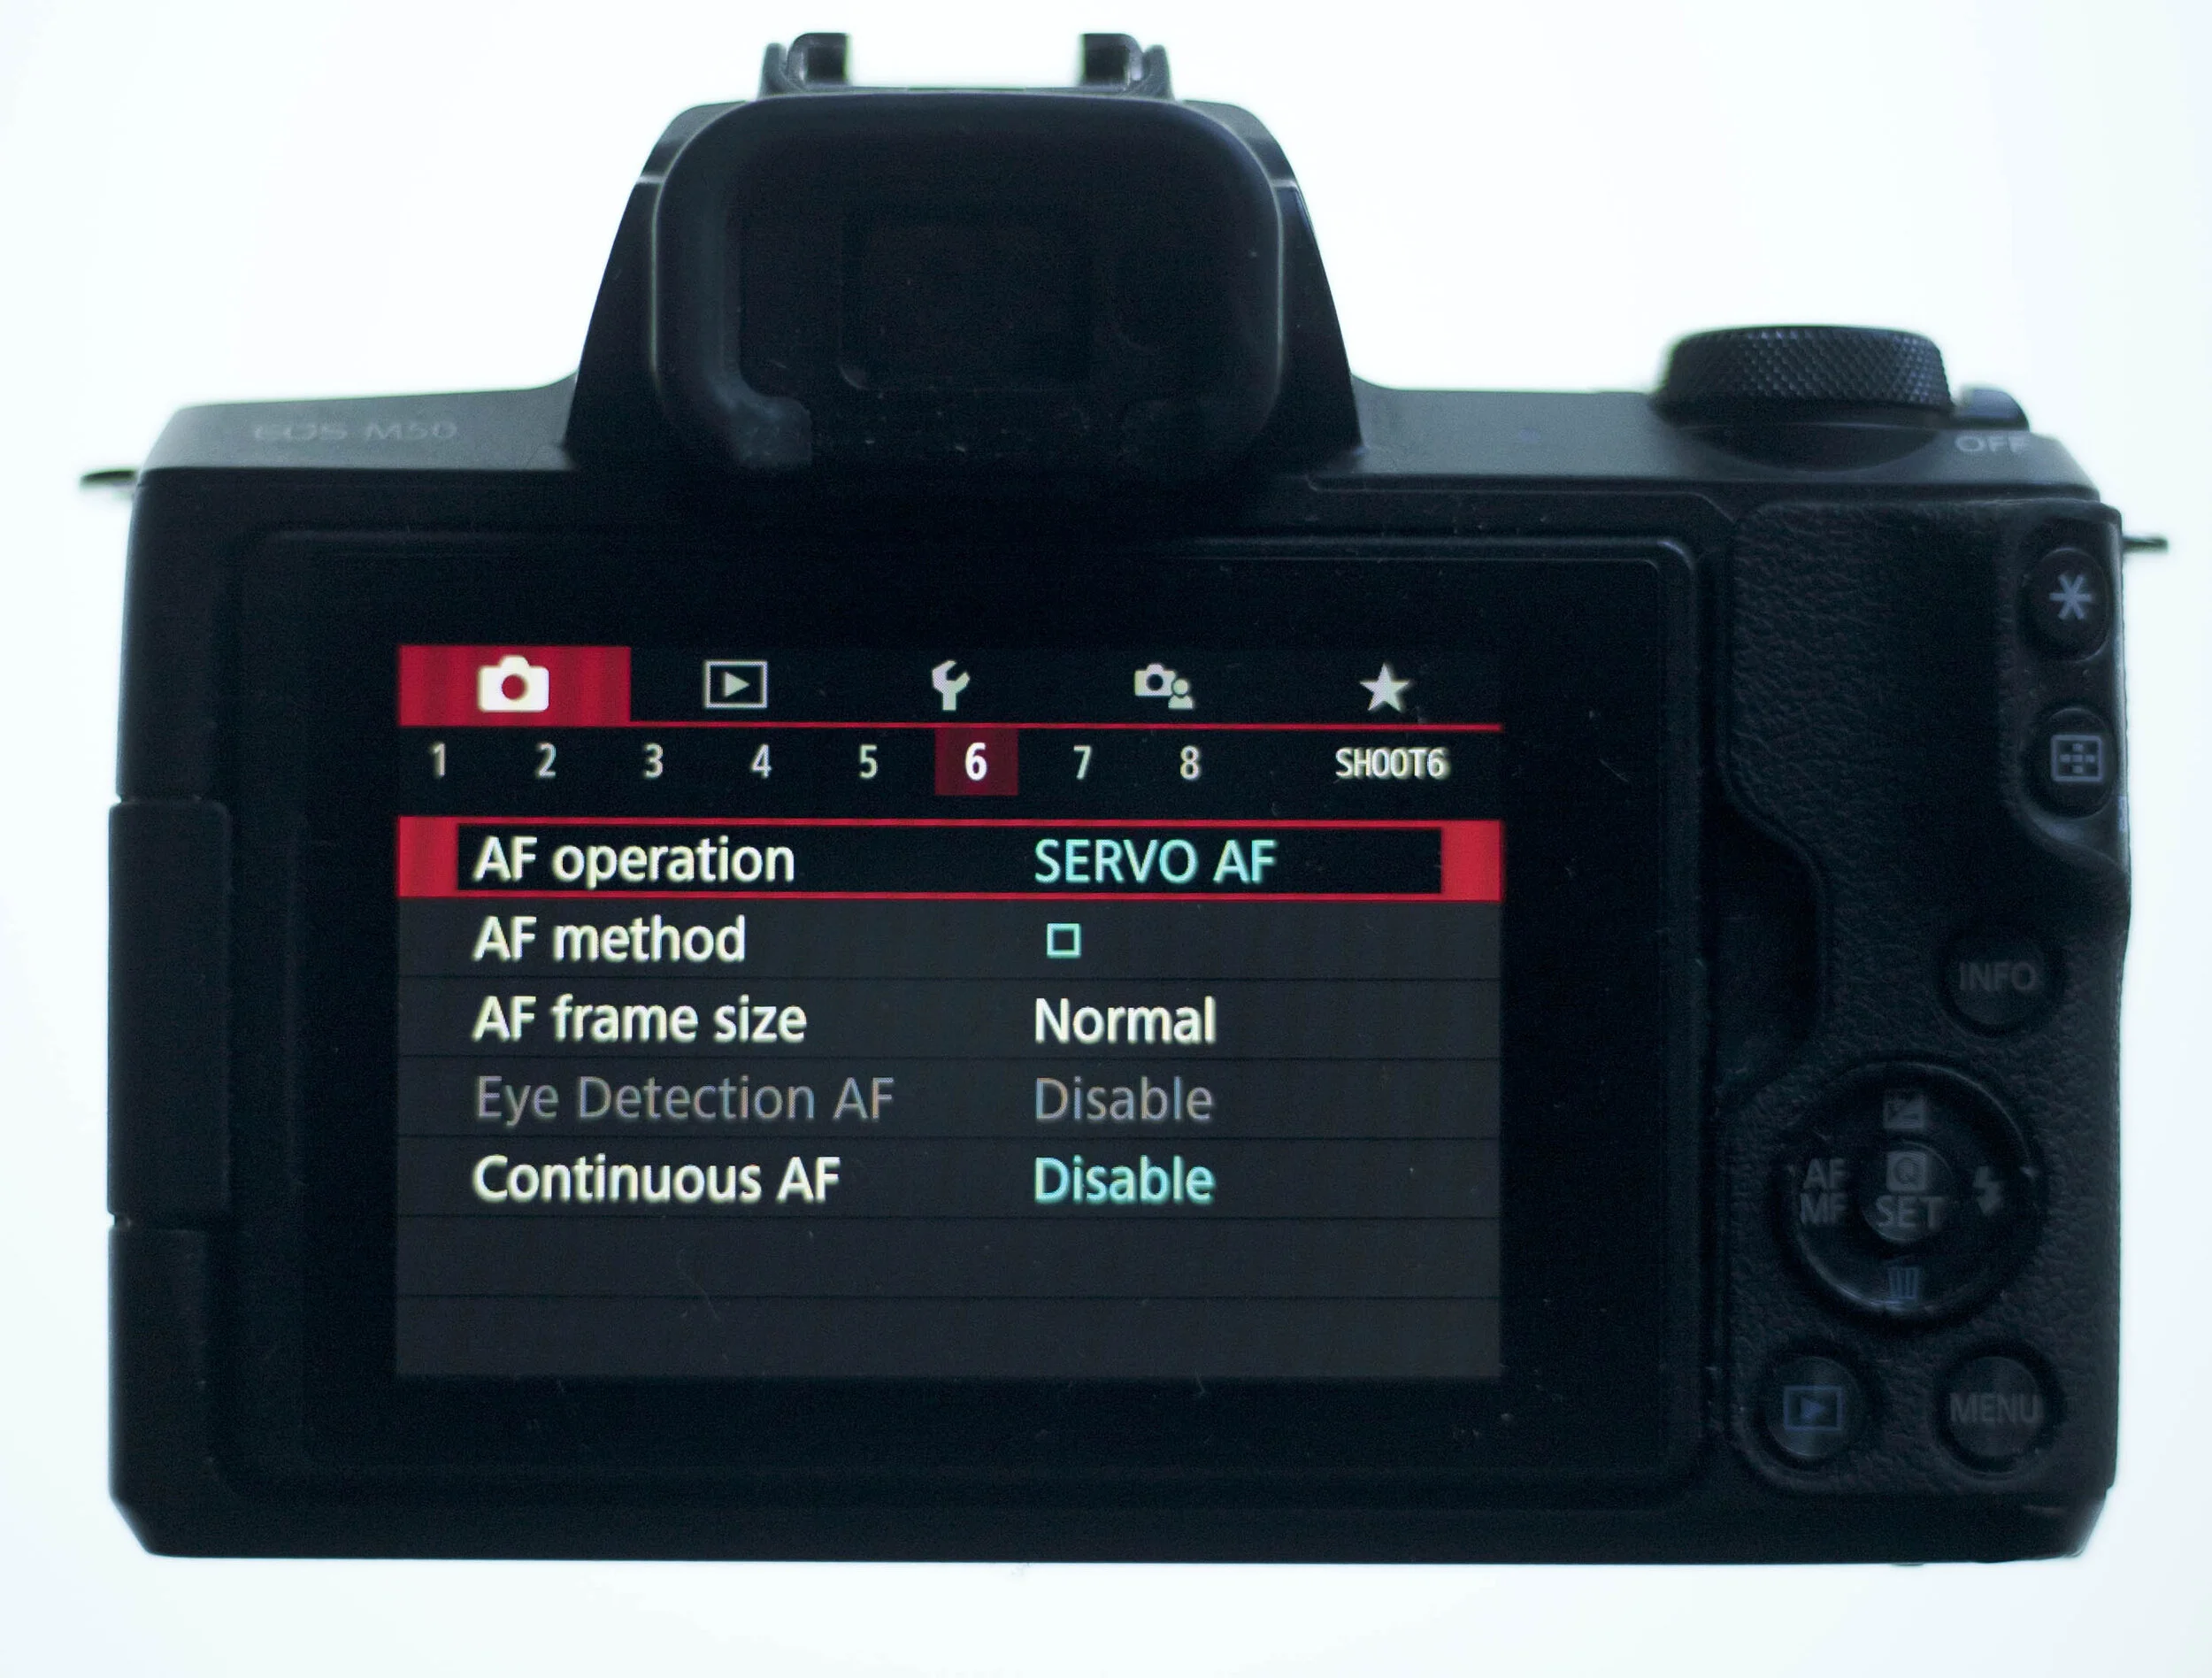
Auto Focus Operation
This is a very important setting for action, birds and wildlife. Anything where the subject is continually moving.
Turn on ‘Servo AF’ so that the autofocus will track the subject.
You can turn on ‘One Shot’ for more accurate auto focus for stationary subjects.
Alternatively, you can use the AF Stop method. You would assign one of the back buttons to Stop Autofocus. This means you won’t have to change modes on the camera and, at the same time, the camera will not keep seeking focus as it does in servo mode.
This is an alternative and opposite method to Back Button Focusing.
AF Method
You should use the smallest focus point for wildlife photography. Zone AF will not work well unless there is adequate depth of field.
So if you have shallow depth of field, choose point AF. If your subject is distant you can use Zone AF.
Face Tracking mode is good for humans.
Canon EOS M50 Custom Button Assignments - Wildlife
Depending on whether you will be using Touch and Drag or Back Button Focus; disable AF or enable AF on the shutter release button.
I don’t use the built in Flash, so I reassign this button to Focus Peaking.
I use the Multi Function Button for ISO adjustments, mainly because ISO is in a similar position on DSLR’s.
I don’t delete images in camera, so I assign the trash button to turn the LCD on or Off.

Canon EOS M50 Custom Menu Assignments
Because there are fewer mode and settings dials on mirrorless cameras, custom menu assignments are very important. These become the fastest way to group and access crucial functions on the camera.
I suggest you think carefully about what settings you need to change for each type of shooting you do and group these logically under one of the 4 custom menus.


