Olympus OMD EM-1 Mark ii Wildlife & Nature Field Review
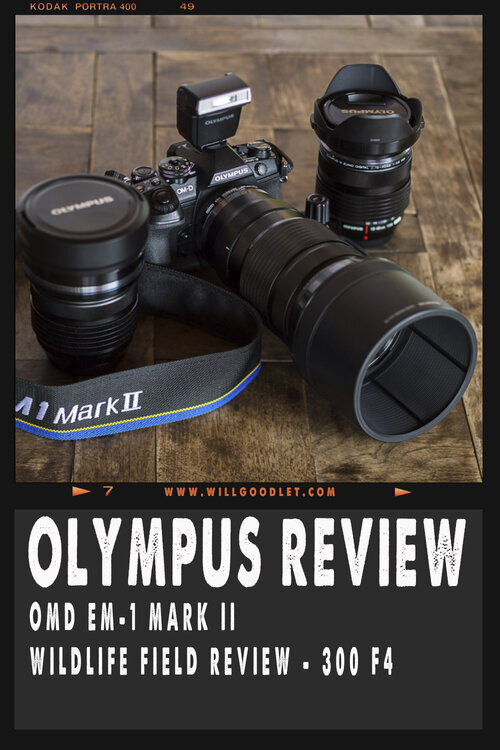

Olympus OMD EM-1 Mark ii, 7-14mm, 12-40mm, 40-150mm
Review Camera and Lenses were very generously provided by Olympus and Tudortech
I’ve recently had the opportunity to use the Olympus OMD EM-1 Mark ii mirrorless camera paired with the 40-150mm F2.8 and 300mm F4 IS Pro and I thought I would share some thoughts and tips in the context of nature photography, in particular wildlife and birds.
Normally I use Canon DSLRs and even though I recently downsized my rather eclectic long lens collection to just two super-teles, I still use a ton of stuff in this rather broad genre. Sometimes I fantasise about picking up just one backpack when going on a trip, especially where flying is involved. The Olympus Micro Four Thirds system packs a lot of punch into a far smaller package than I am used to..
CHECK PRICE
Micro Four Thirds
For those that are unfamiliar with the difference between micro 4/3 mirrorless and 35mm DSLRs it mostly relates the the internal mechanism of the camera and the overall size of the image sensor.
Mirrorless cameras do away with the prism and mirror system that allows the photographer to look through the lens when taking a picture. Instead, they show the scene in an electronic viewfinder or on the LCD mounted on the back of the camera. The advantage of this approach is that the camera can be made smaller.
So mirrorless cameras are generally smaller and often have smaller image sensors. Using a system that does not require the mirror to move out of the way during each shot also means that they can take more shots in a second than the mechanical DSLR, a feature I was very interested to try out.
Up to now, the downsides to mirrorless systems have been poor battery life, unimpressive viewfinders and slow, inaccurate focus. Additionally, the fact that many of them have smaller image sensors, also means that they tend to underwhelm in terms of noise performance and image quality in low light. The Olympus OMD EM-1 Mark ii has been slated as a camera system that addresses many of these problems.
Olympus OMD EM-1 Mark ii + M 40-150 F2.8 - ISO200, F2.8, 1/90 @150mm - Cropped 10%
Mirrorless and Wildlife Photography
If we think about wildlife photography, we generally see the best and most interesting behaviours taking place in the dim light of morning or evening. We also have animals moving in poor light (requiring good bright lenses and focus systems) and we have to take many many shots all day in order to get a few good ones.
All of these requirements have traditionally played right into the weaknesses of most mirrorless camera systems when compared to DSLRs.
DSLRs with their bigger sensors tend to produce better image quality in poor light, their bigger bodies can house more powerful motors (for focus) and batteries and the fact that they don’t have to display the image through an electronic viewfinder saves power. The downsides are relatively slow frame rates and sheer size and weight.
So what’s new? I wanted to find out... I especially wanted to find out if this Olympus camera was a serious option for nature and wildlife photographers considering an upgrade or a switch from their current DSLR and lenses.
Olympus OMD EM-1 Mark ii + M 40-150 F2.8 - ISO200, F2.8, 1/1000 @79mm
What is important in wildlife photography?
I suppose I should define what I feel is important for wildlife photography and then see if the Olympus ticks those boxes.
Reach
One of the most important things in wildlife photography when dealing with skittish animals and birds is just to get close enough to them to take a decent shot. Obviously, there are a few ways to achieve this but as a minimum, a camera system should allow enough reach to photograph small animals or to photograph distant animals without scaring them.
The right focal length depends on what sort of animals and animal behaviour one hopes to capture. For my purposes, I need a focal lengths between 70mm and 600mm, sometimes up to 800mm. Normally I use two camera bodies and attach a zoom to one and a long prime to the other.
The Olympus system offers two professional choices, a 40-150mm F2.8 and a 300mm F4. It is important to mention that the Olympus has a 2x crop, meaning we have to double those focal lengths to get to the 35mm equivalent field of view.
After doing the mathematics we end up with an equivalent focal length of 80-300mm F2.8 and 600mm F4. Pretty exciting focal lengths for those apertures, especially if we add the 1.4 teleconverter which take them to equivalent focal lengths of 112-420mm F4 and a 840mm F5.6.
Olympus OMD EM-1 Mark ii + M 40-150 F2.8 - ISO400, F2.8, 1/2000 @150mm - Cropped 30%
Low Light
If you have ever tried to pick up a 400mm F2.8 Prime or a 600mm F4 you will know that they are hefty beasts, the price of great low light performance is weighed in Kilograms as well as Rands and cents.
Even the variable aperture 150-600mm zooms from Sigma and Tamron are pretty weighty and large.
Dropping down to Four Thirds is a real advantage because long bright lenses can be made much smaller.
I tried out the 40-150 F2.8 and 300mm F4. Both of these lenses are very high quality and deliver sharp images wide open.
The 300mm F4 is smaller than a Canon 100-400 zoom, probably about the same size as a 70-200 F4 and this lens offers an equivalent focal length of 600mm!
The wide F4 aperture undoubtedly helps the Olympus handle low light better, gaining between 1 and 1.3 stops over a number of DSLR lenses of equivalent focal length. With at least double the extra light streaming in (no need to stop down the Olympus' aperture), the image sensor can afford to be a little smaller.
Autofocus
I consider good autofocus crucial to my kind of photography. I am much more interested in behaviours and movement than static portraits, so it’s crucial that my camera system performs. The Olympus, perhaps surprisingly for a mirrorless camera, has excellent, snappy and DSLR-like autofocus that covers the entire frame, unlike many DSLRs. More on this below.
Frame Rate
When the wildlife moves you want to capture the action. A high frame rate is really useful and this is something the Olympus delivers in spades. In fact, I shot during testing at 18, 30 and 60 frames per second and this phenomenal speed opened me up to a whole new shooting style. The very best and most expensive DSLRs can only manage 14 frames per second at the moment. It really is amazing how many frames are unusable (due to body or wing positions) when photographing fast-moving action, so higher frame rates really pay off enormously.
Olympus OMD EM-1 Mark ii + M 40-150 F2.8 - ISO200, F2.8, 1/1600 @150mm - Cropped 70%
Portability
You know the old adage, the best camera is the one with you? Well the Olympus is small enough to take anywhere over one shoulder. If you are travelling on light aircraft or overseas this is a massive benefit. It also has superb image stabilisation, so you might get away without a tripod too!

Olympus OMD EM-1 Mark ii + 40-150mm Left, Canon 7D Mark ii + 100-400 Right
Weather Sealing
The conditions I photograph in are characterised by extreme heat (45 degrees celsius), Cold (below freezing), chronic fine dust, some rain and constant vibration and knocks from poor road surfaces.
My Canon cameras have stood up to the punishment perfectly. The Olympus has weather sealing and seems solid and robust. I haven’t stress tested the camera because it isn’t mine, but it seems well-built and solid enough to sustain a drop and tumble in the Land rover. If you can shoot two bodies and avoid changing lenses in the field, I am sure that will go a long way to keeping the camera’s internals healthy.
Image resolution
Image resolution showing lots of detail is a really nice thing to have, especially for those images that end up as prints rather than being shared online. The Olympus delivers a 20 MP sensor for normal shooting but adds sensor shift technology and an additional 8 shots to generate 50MP JPG files and 80MP RAW files. Astounding. Although, obviously, this doesn’t work for moving objects.
The 20 MP is an improvement over the previous versions 16MP and now makes cropping more of a possibility.
Olympus OMD EM-1 Mark ii + M 300 F4 - ISO640, F4.0, 1/1600
Image quality
Of course, you want good image quality, especially for any print work. A larger format sensor is likely to be best but the Olympus does very well here. The quality of the lens also plays a big role and the Olympus lenses are very evidently highly engineered, excellent and pretty sexy looking pieces of glass. It's not a 35mm full frame but the image is extremely good, especially given the size and versatility of the camera.
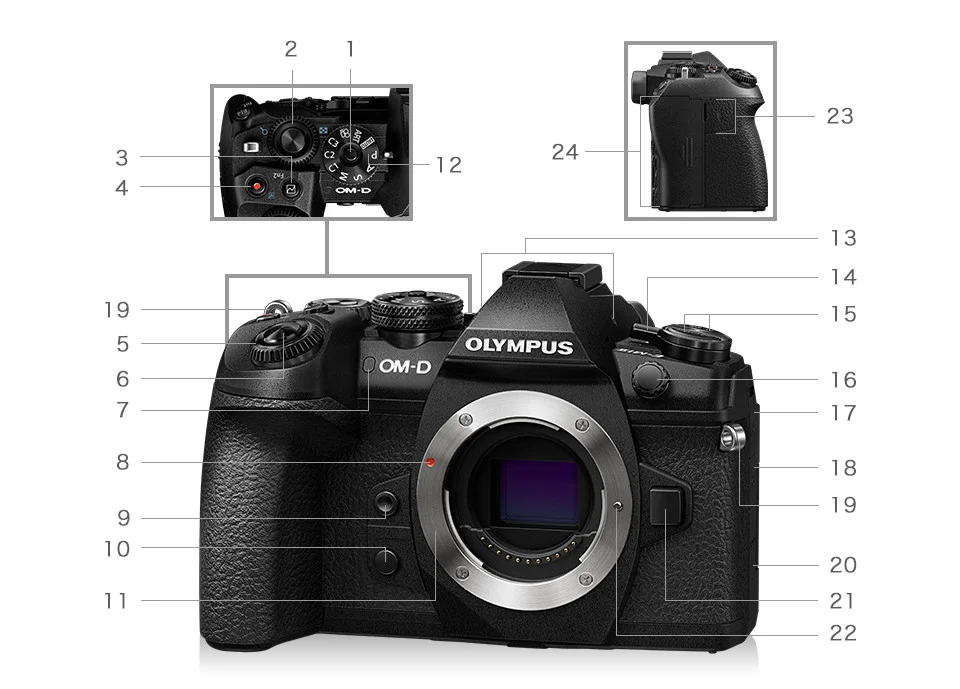
THE OLYMPUS OMD EM-1 MARK ii
Specifications
The Olympus ticks a lot of those important boxes but let’s have a look at the details and compare it to some of the (albeit older) DSLR competition.
Looking at the specifications table it’s clear that there are some seriously interesting items. Key for me are:
Variable angle pop-out touch LCD
Cross-type AF points across the whole frame
Up to 18 Frames Per Second with Autofocus and 60 FPS without
35 Pre-shutter frames (that’s right it can take pictures of action before you actually press the button! Firmware update required.)
More on this good stuff below...

NB// Firmware update allows for 35 pre-capture frames and smaller more accurate AF points
Ergonomics

Coffee and hot cross bun while locked on a swallow.
As someone with reasonably large hands I found this camera pretty dinky and small. There’s nothing all that wrong with that except that some of the buttons and knobs are hard to reach.
Holding it for a long time became a bit of a problem, the hard edges of its retro look casing, although slightly curved, started to dig into the palm of my right hand painfully. I also found that the four-way control and ‘ok’ button were hard to reach with my thumb, making changes to AF points and pulling up the Super Menu slightly tricky. I have a feeling that adding a grip would eliminate this problem.
The camera has a few alternate ways to change the focus points and modes, so depending on how much of an X-box fanatic you are (i.e. good finger coordination) you may find some of the shooting options quite innovative.

Lens mounted directly to tripod with handy Arca foot
One such feature is the ability to control the focus groups with your left thumb on the back of the LCD. You can drag the points around to follow your target while looking through the viewfinder. If you don’t like that idea, it’s easy to turn the feature off and use the four-way thumb control instead.
On the positive side of the Olympus small size is the ability to throw the camera around quickly. One can even photograph one-handed.
It may sound like a small thing, but my normal gear weighs 4.2KG and just picking it up and pushing it out the window to take a shot can often cause me to miss the opportunity. No such problems with the Olympus, it can be grabbed and trained on the subject in moments. Another huge bonus is that it can comfortably sit on your lap while on a game drive, yes, that means that now your wife/husband/girlfriend/boyfriend can sit next to you and ushers in a whole new dynamic in marital relations!
Olympus OMD EM-1 Mark ii + M 300 F4 - ISO200, F4.0, 1/1600
An absolute favourite feature has to be the pop-out LCD screen with touch control. I shoot waist level medium format film cameras and love the perspective they offer on the world. Well, with the Olympus I was able to take candid waist level shots of people. With the camera held low and being so small and painted black, they never even saw me shooting.
Olympus OMD EM-1 Mark ii + M.40-150 F2.8 - ISO400, F2.8, 1/90 @79mm - Cropped 12%
Of course the LCD is useful for more than that, not having to lie down in the mud, holding one-handed out the window for the low-level elephant shot, reversing for the selfie or the vlog.
Another great feature is the ability to program literally every button on the camera to do whatever it is you want. You can even re-purpose the on-off switch, something that I have never encountered before!
Olympus OMD EM-1 Mark ii + M.40-150 F2.8 - ISO400, F3.2, 1/320 - Cropped 80%
For my own setup I changed the camera to Back-Button-Focus and changed the convenient curves button (function button 2) to toggle the electronic teleconverter amongst other things. The great thing about the ability to customise the button functions is that the camera can be made to behave almost the same as my Canons which made it very easy to move between them when shooting in tandem.
Comparing the camera to my Canons, I don’t find that it sits as easily in the hand and, for me, the Canons are ergonomically superior. I find the menu system and the button configuration on the Canon’s very easy to use without taking your eye from the viewfinder. The Olympus fights back with all sorts of nifty and well thought out features, one such is the inclusion of an ARCA compatible lens foot, just slide it right into that tripod, no need for a lens plate.
While the Olympus does allow you to bring up the convenient Super menu in the viewfinder (and the Canons do not) it is still fiddly to operate with the directional keys being hard to access with the thumb.
Olympus OMD EM-1 Mark ii + M 300 F4 - ISO400, F4.0, 1/1600 - Cropped 40%
Menu system and setup
One thing that comes with an advanced, capable and customisable camera system is complexity. There is no getting around this and the Olympus menu system is deep, very deep.
For an experienced photographer, it is not too bad, one knows that the camera has or should have certain functionality and before long you will find out where it is and how to set it. If, on the other hand, you are a beginner, the menu system could really cause you to struggle.
If you are coming from another camera system there will undoubtedly be moments while out shooting where F-words are firing like crackers in your head. I had one moment where I inexplicably got stuck in an HDR mode while trying to photograph a malachite kingfisher.
As a film shooter I do admire simplicity, and given the retro styling of this Olympus (harking back to the famous OM-1 of 1973) it could be simpler!
There will be no doubt that as a new user you will be googling for about 5 to 10 hours to figure out how things work. The first thing I googled, somewhat embarrassingly, was how to set the diopter! I thought it was electronic and overlooked the little dial sitting exactly where it should be next to the eye-piece.
However, once you get over the system shock or ‘technofear’ as a friend used to say, the menu does make sense and even though it has many options and a number that interact with each other, it is possible to get the camera nicely dialled-in.
I’ve attached a setup guide to the review which will hopefully save wildlife shooters a lot of time.
Olympus OMD EM-1 Mark ii + M 300 F4 - ISO200, F4.0, 1/1250 - Cropped 35%
Electronic Viewfinder (EVF)
The Olympus has an electronic viewfinder. That is both good and bad. The good is that you can display amazing information in the screen, you can magnify it to aid focus, you can get direct feedback on exposure, white balance and other adjustments without having to imagine them as in an optical finder, there is much less mirror blackout when shooting rapidly (seriously good!!), the lag is very minimal and not too distracting. Another great feature, for those who cannot ‘see’ in black and white, is simply to switch modes to monochrome in the EVF, something that can’t be done with an optical viewfinder.
The bad is that you need to figure out how to customise it. It is not always clear what you are focused on and the focus indicator is high on the right side and needs to be consciously looked at. Provided you have a single AF point selected, the best bet is just to assume that the camera is focused correctly because most of the time it is - its AF is that good.
When you really need critical focus use the focus peaking functionality. Using magnification and focus peaking will really allow fine-tuning of critical focus.
Something else I noticed was that the EVF struggles to display bright highlights and these can often look blown in the display but be perfectly fine in reality. In this case, I programmed the depth of field preview button to switch the EVF to simulated optical view instead.
For video, the EVF is a godsend for those who, like me, are long sighted. I can no longer hold my Canon camera far enough away to determine whether video is in focus on the LCD. With the Olympus, it is a cinch. Looking through the EVF, everything is crystal clear while using video.
The EVF is hugely customisable, so if you don’t like a feature I have no doubt that it can be changed in most respects, as always with this complex device, it’s not always obvious how to do it.
Battery Life
Battery life has been one of the major achilles heels of mirrorless cameras. Olympus has updated the battery life with this model, however I was able to burn through it in 3.5 hours of early morning shooting on both of the days I was photographing birds in flight.
There are plenty of other reviewers out there who say the battery is good for a days wildlife shooting, however, there is no way I would venture out for real without two or even three batteries for BIF. I’d guess for general wildlife and landscapes one could make the battery last all day.
I have an inverter in the car and used it to recharge the battery over lunch when the light was too harsh. One thing I did note while doing this was that the battery charges really quickly, even a few minutes will put 30-40% back into it (obviously a full charge is advisable for good battery life).
If I was to add this camera to my own kit, it would only be with a grip and extra battery.
Shooting speed
The Olympus OMD EM-1 Mark ii is, for me, all about this killer feature. I didn’t even know how amazing it is to have 60 frames per second (FPS) under my forefinger until I tried this camera. It is simply INCREDIBLE. If you adapt the way you shoot to use it, then all sorts of ridiculous things become possible.
I have struggled in the past to capture Kingfishers in flight. With this camera I did it on the first attempt! Before the end of the morning, I had a kingfisher in flight, swallows in flight, reed warbler in flight, terns in flight, egret in flight and a cisticola in flight.
The Olympus will shoot at up to 10 FPS with its mechanical shutter and still attempt to focus. If you move to Silent Low Mode you can take it to 18 FPS with continuous focus. Switch to high mode and you lose Autofocus but gain up to 60FPS! You can customise the speed - handy because that is one hell of a lot of RAW images and memory you are burning through.
![Caption:Olympus OMD-Eii Test
Rietvlei, South Africa
Photo Information:
[OLYMPUS CORPORATION E-M1MarkII + OLYMPUS M.40-150mm F2.8] [ISO500, SS 1/2000, F3.2, FL135, Flash:]
Charles William Goodlet
will@willgoodlet.com](https://images.squarespace-cdn.com/content/v1/586fc0a6bf629abf69254ce7/1520294942044-NRHQJ45LX0V166RHXRRF/Goodlet_180224__2240125.jpg)
![Caption:Olympus OMD-Eii Test
Rietvlei, South Africa
Photo Information:
[OLYMPUS CORPORATION E-M1MarkII + OLYMPUS M.40-150mm F2.8] [ISO500, SS 1/2000, F3.2, FL135, Flash:]
Charles William Goodlet
will@willgoodlet.com](https://images.squarespace-cdn.com/content/v1/586fc0a6bf629abf69254ce7/1520294944574-D4Q5JAZ4O7S1L729UGY9/Goodlet_180224__2240127.jpg)
![Caption:Olympus OMD-Eii Test
Rietvlei, South Africa
Photo Information:
[OLYMPUS CORPORATION E-M1MarkII + OLYMPUS M.40-150mm F2.8] [ISO500, SS 1/2000, F3.2, FL135, Flash:]
Charles William Goodlet
will@willgoodlet.com](https://images.squarespace-cdn.com/content/v1/586fc0a6bf629abf69254ce7/1520294953211-TR82W9YP282AS2STCKZU/Goodlet_180224__2240128.jpg)
![Caption:Olympus OMD-Eii Test
Rietvlei, South Africa
Photo Information:
[OLYMPUS CORPORATION E-M1MarkII + OLYMPUS M.40-150mm F2.8] [ISO500, SS 1/2000, F3.2, FL135, Flash:]
Charles William Goodlet
will@willgoodlet.com](https://images.squarespace-cdn.com/content/v1/586fc0a6bf629abf69254ce7/1520294956457-O81JD66XRH59PLRAXGZS/Goodlet_180224__2240129.jpg)
![Caption:Olympus OMD-Eii Test
Rietvlei, South Africa
Photo Information:
[OLYMPUS CORPORATION E-M1MarkII + OLYMPUS M.40-150mm F2.8] [ISO500, SS 1/2000, F3.2, FL135, Flash:]
Charles William Goodlet
will@willgoodlet.com](https://images.squarespace-cdn.com/content/v1/586fc0a6bf629abf69254ce7/1520294966914-KDH08TSLNDQD3GOEYV9K/Goodlet_180224__2240130.jpg)
![Caption:Olympus OMD-Eii Test
Rietvlei, South Africa
Photo Information:
[OLYMPUS CORPORATION E-M1MarkII + OLYMPUS M.40-150mm F2.8] [ISO500, SS 1/2000, F3.2, FL135, Flash:]
Charles William Goodlet
will@willgoodlet.com](https://images.squarespace-cdn.com/content/v1/586fc0a6bf629abf69254ce7/1520294971822-T0UVFHYCOS1YJ8SLE96S/Goodlet_180224__2240131.jpg)
![Caption:Olympus OMD-Eii Test
Rietvlei, South Africa
Photo Information:
[OLYMPUS CORPORATION E-M1MarkII + OLYMPUS M.40-150mm F2.8] [ISO320, SS 1/2000, F3.2, FL135, Flash:]
Charles William Goodlet
will@willgoodlet.com](https://images.squarespace-cdn.com/content/v1/586fc0a6bf629abf69254ce7/1520294981149-SNNYWEO3YKUCW01K66XL/Goodlet_180224__2240132.jpg)
![Caption:Olympus OMD-Eii Test
Rietvlei, South Africa
Photo Information:
[OLYMPUS CORPORATION E-M1MarkII + OLYMPUS M.40-150mm F2.8] [ISO320, SS 1/2000, F3.2, FL135, Flash:]
Charles William Goodlet
will@willgoodlet.com](https://images.squarespace-cdn.com/content/v1/586fc0a6bf629abf69254ce7/1520294983751-LVE2T92MCXVJXXKXPFBQ/Goodlet_180224__2240133.jpg)
What I especially loved was the quizzical looks on the faces of the other ‘togs in the hide as they saw me airily wave my camera in the direction of these small flitting birds. they weren’t even trying with the long 500’s and 600’s.
Another thing, it makes no noise whatsoever. By the time the other cameras had fired 5 shots I was already on frame 30.
There is still more to this story. The Olympus features a mode called ‘Pro Capture’ that works like time travel. You will be familiar with this situation; you are waiting for a bird to launch into the air, you are drilled in quite tightly because you want a lot of detail but it is a risk. You might miss the shot if you are slow on the shutter.
![Caption:Olympus OMD-Eii Test
Rietvlei, South Africa
Photo Information:
[OLYMPUS CORPORATION E-M1MarkII + OLYMPUS M.40-150mm F2.8] [ISO500, SS 1/1600, F3.2, FL150, Flash:]
Charles William Goodlet
will@willgoodlet.com](https://images.squarespace-cdn.com/content/v1/586fc0a6bf629abf69254ce7/1520295104729-N27IGSCAKM31I1YU0H13/Goodlet_180225__2251120.jpg)
![Caption:Olympus OMD-Eii Test
Rietvlei, South Africa
Photo Information:
[OLYMPUS CORPORATION E-M1MarkII + OLYMPUS M.40-150mm F2.8] [ISO500, SS 1/1600, F3.2, FL150, Flash:]
Charles William Goodlet
will@willgoodlet.com](https://images.squarespace-cdn.com/content/v1/586fc0a6bf629abf69254ce7/1520295105332-MN93UX0UBQR70H7EUIEE/Goodlet_180225__2251121.jpg)
![Caption:Olympus OMD-Eii Test
Rietvlei, South Africa
Photo Information:
[OLYMPUS CORPORATION E-M1MarkII + OLYMPUS M.40-150mm F2.8] [ISO500, SS 1/1600, F3.2, FL150, Flash:]
Charles William Goodlet
will@willgoodlet.com](https://images.squarespace-cdn.com/content/v1/586fc0a6bf629abf69254ce7/1520295154120-JFSUFKV0EXJZI8W7BPN0/Goodlet_180225__2251122.jpg)
![Caption:Olympus OMD-Eii Test
Rietvlei, South Africa
Photo Information:
[OLYMPUS CORPORATION E-M1MarkII + OLYMPUS M.40-150mm F2.8] [ISO500, SS 1/1600, F3.2, FL150, Flash:]
Charles William Goodlet
will@willgoodlet.com](https://images.squarespace-cdn.com/content/v1/586fc0a6bf629abf69254ce7/1520295155204-L5MTGR2K1BYO9L3BNX7D/Goodlet_180225__2251123.jpg)
![Caption:Olympus OMD-Eii Test
Rietvlei, South Africa
Photo Information:
[OLYMPUS CORPORATION E-M1MarkII + OLYMPUS M.40-150mm F2.8] [ISO500, SS 1/1600, F3.2, FL150, Flash:]
Charles William Goodlet
will@willgoodlet.com](https://images.squarespace-cdn.com/content/v1/586fc0a6bf629abf69254ce7/1520295202756-Z72KRO6KB1ZVETVWOCI1/Goodlet_180225__2251124.jpg)
![Caption:Olympus OMD-Eii Test
Rietvlei, South Africa
Photo Information:
[OLYMPUS CORPORATION E-M1MarkII + OLYMPUS M.40-150mm F2.8] [ISO500, SS 1/1600, F3.2, FL150, Flash:]
Charles William Goodlet
will@willgoodlet.com](https://images.squarespace-cdn.com/content/v1/586fc0a6bf629abf69254ce7/1520295205050-S9EAUADLHQ66BAXWAU0K/Goodlet_180225__2251125.jpg)
![Caption:Olympus OMD-Eii Test
Rietvlei, South Africa
Photo Information:
[OLYMPUS CORPORATION E-M1MarkII + OLYMPUS M.40-150mm F2.8] [ISO500, SS 1/1600, F3.2, FL150, Flash:]
Charles William Goodlet
will@willgoodlet.com](https://images.squarespace-cdn.com/content/v1/586fc0a6bf629abf69254ce7/1520295254676-N7TZPAN0KXGKQW20UFKW/Goodlet_180225__2251126.jpg)
![Caption:Olympus OMD-Eii Test
Rietvlei, South Africa
Photo Information:
[OLYMPUS CORPORATION E-M1MarkII + OLYMPUS M.40-150mm F2.8] [ISO500, SS 1/1600, F3.2, FL150, Flash:]
Charles William Goodlet
will@willgoodlet.com](https://images.squarespace-cdn.com/content/v1/586fc0a6bf629abf69254ce7/1520295256658-IOZ40WFYCU6CX5DQ0D2T/Goodlet_180225__2251127.jpg)
![Caption:Olympus OMD-Eii Test
Rietvlei, South Africa
Photo Information:
[OLYMPUS CORPORATION E-M1MarkII + OLYMPUS M.40-150mm F2.8] [ISO500, SS 1/1600, F3.2, FL150, Flash:]
Charles William Goodlet
will@willgoodlet.com](https://images.squarespace-cdn.com/content/v1/586fc0a6bf629abf69254ce7/1520295304136-XPPZIKAUK4X3MUBX9GCS/Goodlet_180225__2251128.jpg)
![Caption:Olympus OMD-Eii Test
Rietvlei, South Africa
Photo Information:
[OLYMPUS CORPORATION E-M1MarkII + OLYMPUS M.40-150mm F2.8] [ISO500, SS 1/1600, F3.2, FL150, Flash:]
Charles William Goodlet
will@willgoodlet.com](https://images.squarespace-cdn.com/content/v1/586fc0a6bf629abf69254ce7/1520295306288-H5VE04FY5210RYWKV4YJ/Goodlet_180225__2251129.jpg)
![Caption:Olympus OMD-Eii Test
Rietvlei, South Africa
Photo Information:
[OLYMPUS CORPORATION E-M1MarkII + OLYMPUS M.40-150mm F2.8] [ISO500, SS 1/1600, F3.2, FL150, Flash:]
Charles William Goodlet
will@willgoodlet.com](https://images.squarespace-cdn.com/content/v1/586fc0a6bf629abf69254ce7/1520295361745-VJRZYH10YCTEAW9RYYR5/Goodlet_180225__2251130.jpg)
![Caption:Olympus OMD-Eii Test
Rietvlei, South Africa
Photo Information:
[OLYMPUS CORPORATION E-M1MarkII + OLYMPUS M.40-150mm F2.8] [ISO500, SS 1/1600, F3.2, FL150, Flash:]
Charles William Goodlet
will@willgoodlet.com](https://images.squarespace-cdn.com/content/v1/586fc0a6bf629abf69254ce7/1520295361441-E85ODQACU7FMYP4WQ10R/Goodlet_180225__2251131.jpg)
With the Olympus, with the shutter half-pressed, it is already taking pictures, so if you release the shutter late as the bird takes flight, the camera records the previous 35 frames (Firmware update required) before you pressed the trigger. That is smack-me-down impressive.
One downside to all these frames in such a small amount of time is the writing to the card. The camera will let you take more shots (the buffer seems enormous) but basically locks up and you can’t change settings while writing is going on. I wasn’t using the fastest cards by a long way as I am not normally a spray and pray shooter. You may find that with better SD cards the issue is not so bad.
Olympus OMD EM-1 Mark ii + M 300 F4 - ISO800, F4.0, 1/1250 - Cropped 40%
Tracking and Autofocus
NB// Feb 28, 2018 - Olympus offered a MAJOR firmware update allowing for setting the AF point to smaller sized points as well as a Focus Stacking Feature (great for macro and landscapes) and overall improvements have been made to the AF system. My review camera did not have these major improvements installed.
I did a bit of reading about the new and improved continuous autofocus of the new Olympus OMD EM-1 Mark ii and was hoping for good things, after all, autofocus is pretty crucial to my photography. By all accounts, this was a big weakness of mirrorless systems and I’d seen reports of the Mark i version describing it as ‘useless’.
Apparently, Olympus have done a lot of work on the autofocus and that definitely shows, although I can only compare it to the cameras I have shot, mainly DSLRs - which, of course, is pretty unfair - but I don’t care!
The Mark ii is certainly not ‘useless’, in fact it is superlative but it is not without its gremlins. I spent the best part of a day with the camera trying to figure out how to work the AF system. To do this, I enlisted the help of my two German Shepherds, Flash and Frisbee and made them run up and down the garden so that I could get action shots of them running towards me much like a pack of wild dogs might in the bush :)
I was hoping that this test would go well and would be over quickly, lucky for the dogs, who enjoyed the play, it went on all day as I became more and more frustrated with the Olympus’ apparent non-performance.
All the online advice was of the camera succeeding with this task. There was a guy on a bike going the same speed as a quarterback, there was a dude running across the camera shop, all, apparently, in sharp focus.
Olympus OMD EM-1 Mark ii + M 300 F4 - ISO200, F5.0, 1/1250 - Cropped 32%
I couldn’t tell from the videos, but something was rotten in Denmark, as they say. No matter what settings I tried I could not get a series of sharp frames of Flash running fast towards me.
The Olympus does not easily pass the dog test.
The reason it doesn’t is because it works much better on more distant and contrasty subjects than ones with similar contrast (and close background) rushing directly towards it at speed from very close range. One option, if you need this kind of shot, is to switch to a wider lens in which case the camera performs much better. I was using the 300mm F4 quite tightly framed.
A second option is to fire in bursts of three or four images. Doing this allows the AF to snap back onto target.
I did also try the AF on a running human, my wife in this case. Framing her face as she ran with a dark green wall as a background, the Olympus finally tracked with ease. So for moving humans, at least contrasty ones, the camera will track focus very well in Continuous AF mode.
The next day I took the Olympus to play at Marievale bird sanctuary, a RAMSAR site near Nigel in South Africa. Here, the Olympus performed brilliantly on small tricky little birds moving erratically.
I found that where the birds were moving obliquely or from side to side, the camera was able to acquire and keep focus, especially with distant backgrounds. I even found that it could lock on to some fast moving targets in front of a close background - that is good by any measure. However, for closer birds moving fast and directly towards me, the camera did not lock-on very well.
Olympus OMD EM-1 Mark ii + M 300 F4 - ISO200, F5.6, 1/200 - Cropped to 66%
One technique that I found to work, was to lock the birds with sky as a background and follow them down to the ground, a lot of the time the camera would keep the lock far better than my Canon 7D mark ii.
A really pleasing feature is the ability to use focus points across the whole of the sensor to track small targets. The camera seems to intelligently pick up the object near the centre in preference to background clutter or other objects and then consistently tracks it.
All-in-all I was very impressed, especially as when comparing it to my Canon 7D mark ii + 400mm F2.8 and 1.4 TC (not the best Autofocus combination) it nailed the focus more easily and far more often on small birds in flight.
Another thing I noted with pleasure was how well the camera locked on to flushed birds breaking from cover. It nailed focus most of the time, not always on the head or eye - it usually finds the closest object (like a wingtip) - you will need to manage depth of field. The fact that the viewfinder hardly blacks out between frames is also a real bonus when tracking.
Speaking of the viewfinder I had one big gripe, when the camera is not against your eye the EVF shuts off. For flushed birds I lost many shots while waiting for the EVF to spool up and show me the scene. To get around this, I covered the EVF with my right thumb when walking, moving the camera quickly to my right eye with my thumb in place ensured the EVF was spooled up and working once I looked through it. I imagine there is a setting that addresses this - time for another google search!
All-in-all, for the birding and bird in flight test I thought the mirrorless camera AF did really well. Most wildlife photography will be far less demanding than this, and shots of lions or trotting zebra are likely to be a walk in the park.
I should mention that the settings to get to a point where the camera can be used for Bird-in-Flight are by no means obvious and if you are interested you should see the setup guide I have included below.
Software Focus Limits & Micro Focus Adjust
In addition to the built-in limits on the lens switches, the Olympus allows for software limits programmed via the menu system. Although I didn't have time to set these up I think they will be incredibly useful for bird-in-flight photography, where lens focus limits generally don't suit every specific situation.
The camera also offers Micro Focus Adjust per lens and in 25 different areas! This is way ahead of my Canon cameras, which do offer MFA but only as a whole. I've tested my Canon lens focus accuracy using Focal software and they are relatively accurate but there are one or two points that don't perform quite as well as the others. A feature like this would allow me to rectify that.
Metering
I should note that the metering seems to be exceptionally accurate, and does not require the standard Canon ⅓ to ⅔ positive exposure compensation. More importantly, the Olympus offers spot metering on the focus point. Currently, only the top of the range Canon 1D models or high-end Nikon camera bodies offer this. It is a very useful feature that many Canon shooters have to battle without.
The camera also allows metering correction. This allows you to change the metering if you feel that the camera is constantly under or overexposed independently for each metering mode.
Other Features
There are so many aspects to this incredible system that I didn't have time to explore all of them. I am intrigued, as an occasional macro shooter by the built-in focus stacking feature. Even for landscapes, now that I think of it, this feature would be fantastic. The Olympus also has the ability to display the progress of long exposure shots like star trails.
It's often the case that the standard timer delays are problematic. Two seconds is too short to eliminate vibration and ten seconds often too long. The camera allows customisation of these times, presumably as part of the built-in intervalometer. Even more interesting is that longer shutter releases of up to 60 seconds are also possible and that the timing is customisable. The shutter speed can also be set to values over 1/8000th of a second. All the way up to an incredible 1/32000th of a second. Great for high-speed photography!
I should also note that the Olympus makes use of Dual SD card slots and that one can program them to work in many different ways. For example, you may decide to record Video to one card and stills to the other.
Image Quality
Olympus OMD EM-1 Mark ii + M 300 F4 - ISO250, F4.5, 1/500
The Olympus OMD EM-1 Mark ii is a Micro Four Thirds camera with a two times crop from a standard 35mm. This is a handicap as larger sensors with large photoreceptors are better able to produce higher-quality images. Nevertheless, the Olympus’ 20MP sensor does a surprisingly good job, aided no doubt, by the excellent fast glass.
Comparing the images to my Canon 7D mark ii at the same magnification and ISO was a revelation, they both looked about the same even though the Canon has a larger sensor. I was not expecting the images to be comparable.
I decided to up the ante and test the Olympus against far more expensive glass. I put it up against the Canon 7D mark ii and 400mm F2.8, and now, for distant shots at least, there was no comparison. If you are planning on selling your fast long primes and replacing them with a smaller mirrorless camera, you will definitely sacrifice quality on distant subjects but at the same time you will undoubtedly get more chances at shots that the big primes just could never get in the first place.
Using the Olympus with the 300mm F4, I certainly have good usable images, just not as good as with the more expensive gear.
For close subjects where you can fill the frame, the Olympus delivers outstanding quality - it's pointless to compare it at this range.
The colour rendition was very pleasant and accurate to my eye, the noise in the backgrounds was expected but not too bad and at lower ISO the noise was not an issue.
One thing to note about the Olympus is that it does not have a low-pass filter. This yields incredible levels of sharpness that is strikingly evident when looking at the textures in bird feathers.
Olympus OMD EM-1 Mark ii + M 300 F4 - ISO500, F7.0, 1/1600 - Cropped 74%
The whole system is also helped by state-of-the-art in body image stabilisation on 5 axes. I’d have to say, that in practice it works very well indeed. Combined with the fast lenses, the fact that you can lower the shutter speed and let even more light in means that we don’t have to rely on ISO nearly as much to add brightness.
The Olympus, as I mentioned above, can also make use of sensor shift technology to take 50MP or 80MP shots. It does this by stacking the output from 8 separate frames, having moved the sensor ever so slightly to cover tiny gaps between pixels. Obviously, there are limitations in practice due to subject movement, but for still lifes and landscapes it is a great feature.
The other thing I like about the Olympus is that it is a 4:3, to me, especially in portrait, this format just looks far more pleasing to the eye. The nasty skinny 2:3 is gone, replaced by something much more pleasant, especially for vertical shots. Additionally, 4:3 works really well for Birds in flight, the wing positions are clipped less often because of the fatter framing.
All in all, I found that the camera delivered better than expected image quality that is comparable with APS-C sensors.
Depth of Field
One thing that doesn’t get mentioned much when talking about crop factors is the effect on depth of field. When we apply a crop and get an equivalent focal length for 35mm we should also do the same for depth of field.
In the case of the 300mm F4, the depth of field would be equivalent to a 600mm at F8. Something like 30cm for a subject at 15m distance. It is important to note that the light entry is not affected and the aperture is still F4, it’s just the sensor is smaller and the depth of field is affected as a result.
The increase in depth of field could be seen as a bonus, it is rare to be able to shoot fast lenses wide open with a deeper depth of field. You may want the lens wide open to reduce ISO and improve image quality but still need the depth of field to be deeper in order to get the whole face of an animal in focus. With a long 35mm format lens you might just have to stop down the aperture and take the ISO hit.
Of course, this works the other way and could be seen as a disadvantage, especially where you rely on that wide aperture to blur out a background. The Olympus depth of field will always be deeper than the equivalent 35mm format.
Olympus OMD EM-1 Mark ii + M 300 F4 - ISO160, F4.0, 1/60 - Cropped 78%
Lens selection & portability for travel

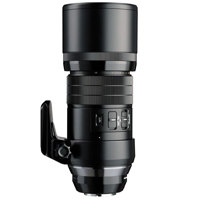
Olympus M.Zuiko Digital ED 300mm f/4 PRO Lens
One of the things I find most exciting about the Olympus is its portability. It’s not just light in hand, a whole kit with 300, 40-150, 12-40 and 7-14 lenses with two bodies will fit in a normal shoulder bag or small backpack. That is a lot of punch that can be taken to distant destinations.
Travelling with my long canon lenses by light aircraft is possible, but only where I leave most of the landscape kit behind. I have to be selective in my gear and generally have a travel pack that excludes the longer faster glass. It would be refreshing to have pretty much all I need in one small bag.

Olympus M.Zuiko Digital ED 40-150mm f/2.8 PRO Lens
The pro lens lineup from Olympus is exciting for a couple of other reasons too. They are weather sealed, as is the camera body and they also feature constant aperture and internal zoom, some even include additional in lens image stabilisation which works in tandem with the body to delver an extra stop of stabilisation - 6.5 stops! The Malachite Kingfisher above was shot at F4 and 1/60th of a second hand held - totally impossible with a DSLR, which would have had to crank the ISO up about 2.5 stops or about 640 as a minimum to manage this.
Constant Aperture & Internal Zoom
Variable aperture lenses like the Canon 100-400 F4.5-5.6 L IS USM Mark ii or Simga 150-600 DG OS HSM are a bit of a pain, especially when using manual mode because the maximum aperture varies depending on zoom. You have to be careful that you are not changing exposure when extending it. Constant aperture zooms are superior in my book. Effectively, for me, I set the Canon at F5.6 and never make use of F4.5 as a result.
Internal zoom on the other hand, means that the lens doesn’t extend in and out based on the focal length selected. It might sound like a small thing, but it means you don’t need to adjust your grip to balance the camera and the glass doesn’t extend across the faces of people who may be sitting next to you on a game drive.
Large Aperture Lenses
One other really exciting thing about the lens lineup is the commitment to F2.8. The 7-14mm F2.8 looks like a little beast with its exaggerated bulbous front element. At a 35mm format equivalent focal length of 14 - 28mm and with an aperture of F2.8 it is crying out to be tried for astrophotography. If the astigmatism and coma isn’t too bad it should be a little cracker.
Lens Filters
Lens filters are often overlooked for telephoto photography. It is fiddly to use a drop-in filter and is a potential point of dust ingress. Most of us don't use them as a result. The problem with ignoring filters on telephotos is that we end up limiting our shooting conditions and compromising our output.
There is no way to simulate a polarising filter using digital editing. It is one of the last in camera effects that can't be reproduced by software. Another one that cannot be simulated that easily is the depth of field reduction when panning with a ND filter. Most panned shots rely on dialling the aperture to its smallest value to reduce shutter speed - the problem then becomes the deep depth of field and quality loss due to diffraction. Using an ND filter solves this problem and it is possible to get shallow, sharp shots with less contrast and detail in the backgrounds.
Almost no one does this with big tele's because the filters are such a pain. The Olympus is different, it allows us to use standard 77mm ring filters on the front of the lens. Use a polariser on the front for harsh light and reflections (especially over water) and an ND for panning. The polariser is also great for adding a little more contrast and colour to wildlife images, especially in harsh light.
Olympus OMD EM-1 Mark ii + M 300 F4 - ISO250, F5.0, 1/800
Video
The video offering looks pretty good with 4K and image stabilisation. I’m not much of a videographer so I’m not going to offer much here.
Compared to my Canons, it looks excellent to me, especially the image quality and the wonderful stability when hand-holding. The image sort of drifts when you jiggle it, almost as if you were using a fluid mount video head or stabiliser. It definitely shouldn’t hold you back when considering a purchase. Obviously, the reversible flip out screen is seriously helpful when speaking to the camera.
I’ve included a sample of a Heron eating a snake for you to look at...I was pretty excited.

Would I make a 100% switch?
There is absolutely no doubt that the Olympus OMD EM-1 Mark ii is a fabulous camera system. It has a multitude of excellent lenses to choose from (more if you remember that you can use other manufacturers Micro Four Thirds lenses on the body too - and the stabilisation system can be customised to make even better use of them).
The options available on this camera are truly staggering and open up entirely new worlds of photography. The Olympus is awe-inspiring as a frame rate monster and allows shots impossible with larger systems. It's flip-out screen and light weight adds so much versatility to the package. With its fast lenses, weather sealing, accurate and fast AF, robust metal build this camera is a powerhouse.
As an overall package, there is very little that can compete with this system. If you feel that it is expensive, remember that many 35mm format cameras will total more than twice or three times the price.
So what's wrong with this camera system? Almost nothing. It is a fantastic photographic tool. But, for obsessive wildlife shooters who demand the best possible image quality, it cannot compete with top-end Supertelephotos and camera bodies.
Where the Olympus does compete and wins, is in versatility and portability. It's a camera that demands a reevaluation of what subjects you shoot and what you hold important. 35mm DSLRs with top-end primes will undoubtedly excel in that one particular area but become too large or too expensive for most photographers to equip themselves with all the necessary lenses and accessories. In short, a generalist photographer with the inclination to travel would be nuts not to consider the Olympus.
So we are down to the thin end of the wedge. Would I put my money where my mouth is and buy one of these cameras? The answer is a potential 'yes.' I think it is a phenomenal piece of technology and I would love to have one in my kit. However, I am one of those addicted photographers with pretty much every lens. - I even have a medium format kit. There is no way, that I would give up all of this equipment for one system. I'd much rather add the Olympus as my travel system and shoot it in tandem for wildlife. Unfortunately, I just don't have the cash for that!
For others, who are presumably far more sensible, the Olympus makes a wonderful choice, particularly as mentioned, for the serious photographer who travels a lot and has a generalist interest. I doubt there is any other camera that can beat the Olympus at the same price point and in the same versatile and well thought out package.
Review Camera and Lenses were very generously provided by Olympus and Tudortech


Olympus OMD EM-1 Mark ii (source: www.olympus-global.com)


Olympus OMD EM-1 Mark ii (source: www.olympus-global.com)

Olympus OMD EM-1 Mark ii Wildlife Setup Guide
Back Button focus using AEL/AFL Button
Press the ‘Menu’ Button and locate the Gear Icon on the left side of the screen
Select menu ‘A1’
Select menu Item ‘AEL/AFL’
Select menu item ‘C-AF’ (continuous autofocus) and choose ‘Mode 3’
This sets the shutter release button to start exposure metering on a half-push and focus lock and exposure on a full-push and sets the AF to start when the AEL/AFL button is depressed.
*Please note that all the focus modes can be set independently. I would advise setting them all up the same unless you have a strong preference for a different setting in one of the other focus modes.
AF Scanner setting
The AF scanner will prevent further AF if the subject is unclear and contrast low.
Press the ‘Menu’ Button and locate the Gear Icon on the left side of the screen
Select menu ‘A1’
Select menu item ‘AF Scanner’
Choose ‘Mode 3’ to keep scanning for the subject
C-AF Lock (continuous autofocus sensitivity)
The Continuous Autofocus lock sensitivity determines how tightly the AF system stays with the target. The setting can range from loose to tight. The best setting I have found is -1 staying reasonably tightly locked to the target.
Press the ‘Menu’ Button and locate the Gear Icon on the left side of the screen
Select menu ‘A1’
Select menu item ‘C-AF Lock’
Choose ‘-1’
Face Priority
If you are shooting wildlife then I feel Face Priority should be turned off. It is pretty sophisticated in that the AF can locate the subjects eyes and even preferentially locate the left or Right eye!
While it may work for dogs, I am not sure it works for all animals. My preference was to set it to ‘Off’.
Press the ‘Menu’ Button and locate the Gear Icon on the left side of the screen
Select menu ‘A2’
Select menu item ‘Face priority’
Choose ‘Off’
AF Targeting Pad
The AF Targeting Pad allows the use of the touch screen to target the AF area. The idea is that you would do this with your left thumb while looking through the viewfinder. Apparently ones nose does not move the selection. I decided to turn this off.
Press the ‘Menu’ Button and locate the Gear Icon on the left side of the screen
Select menu ‘A2’
Select menu item ‘AF Targeting Pad’
Choose ‘Off’
MF Clutch
Olympus lenses have a neat sliding AF/MF ring that you pull forward (towards you) to engage Manual Focus. The MF Clutch setting enables this so that you can use Manual Focus. Some people don’t like to have manual focus but I do.
Press the ‘Menu’ Button and locate the Gear Icon on the left side of the screen
Select menu ‘A3’
Select menu item ‘MF Clutch’
Choose ‘Operative’
Focus Ring Direction
To cater to those coming from Canon or Nikon systems, the Olympus allows you to focus using either a clockwise or anticlockwise rotation of the ring, pretty neat!
Press the ‘Menu’ Button and locate the Gear Icon on the left side of the screen
Select menu ‘A3’
Select menu item ‘Focus Ring’
Choose your preferred direction.
Button Assignment - Assign Digital TC to Curves button
To re-assign buttons choose menu B
Press the ‘Menu’ Button and locate the Gear Icon on the left side of the screen
Select menu ‘B’
Select menu item ‘Button Function’
Select menu item ‘Fn2’
Choose ‘Magnify’
Release Priority (Important)
The release priority can be set for Continuous AF and S-AF. For Continuous AF this should be set to off.
Press the ‘Menu’ Button and locate the Gear Icon on the left side of the screen
Select menu ‘C1’
Select menu item ‘Rls Priority C’
Choose ‘Off’
FPS Low and Low Silent
This is very important because the Low FPS settings are the only ones available with Continuous AF. The High FPS settings do not allow any AF with the burst, they are just too fast.
The C-AF system will work at 10FPS in mechanical mode and 18FPS in Digital Low Silent Mode.
Press the ‘Menu’ Button and locate the Gear Icon on the left side of the screen
Select menu ‘C1’
Select menu item ‘L Settings’
Choose Max FPS = 10fps.
Choose Low Silent FPS = 18fps
FPS High and High Silent
High FPS mode does not allow AF. Set these to whatever you wish.
Press the ‘Menu’ Button and locate the Gear Icon on the left side of the screen
Select menu ‘C1’
Select menu item ‘H Settings’
FPS Pro Cap High & Low
Pro Cap mode allows the capture of frames prior to releasing the shutter. Choose your frame rate and your pre-release frames here.
Press the ‘Menu’ Button and locate the Gear Icon on the left side of the screen
Select menu ‘C1’
Select menu item ‘L Settings’
Choose ‘Pro Cap’
Choose Pre-shutter frames = ‘35fps’ (for high choose whatever value you want nb// no autofocus)
Image Stabiliser
Set up the Image Stabilisation Mode here.
Press the ‘Menu’ Button and locate the Gear Icon on the left side of the screen
Select menu ‘C2’
Select menu item ‘Image Stabilizer’
If shooting hand-held choose ‘S-IS 1’’Image Stabiliser functions in all directions or just use auto.
Image Stabilisation Priority
Set up stabilisation to take priority over shooting speed - please note that this will reduce the maximum frames per second radically. If you wish to ensure frame rates above 10FPS do not choose 'IS Priority'
Press the ‘Menu’ Button and locate the Gear Icon on the left side of the screen
Select menu ‘C2’
Select menu item ‘Image Stabilization Priority’
Choose ‘IS Priority’
Info & Previews
Press the ‘Menu’ Button and locate the Gear Icon on the left side of the screen
Select menu ‘D1’
Select menu item ‘Info Settings’
Choose ‘Info’
Disable everything except ‘Image Only; and ‘Overall’
Noise Filter off
Press the ‘Menu’ Button and locate the Gear Icon on the left side of the screen
Select menu ‘E1’
Select menu item ‘Noise filter’
Choose ‘Off’
Auto White Balance
Press the ‘Menu’ Button and locate the Gear Icon on the left side of the screen
Select menu ‘G’
Select menu item ‘WB Auto Keep Warm Color’
Choose ‘Off’
Color Space Adobe RGB
Press the ‘Menu’ Button and locate the Gear Icon on the left side of the screen
Select menu ‘G’
Select menu item ‘Color Space’
Choose ‘Adobe RGB’
S-OVF (Simulated Optical Viewfinder)
Turn off simulated optical viewfinder - turn it off to reduce shutter blackout and to normalise the EVF when too bright in bright light.
Press the ‘Menu’ Button and locate the Gear Icon on the left side of the screen
Select menu ‘I’
Select menu item ‘S-OVF’
Choose ‘Off’
Are filters still relevant for wildlife photographers in the digital age? I certainly believe they are. In this post I talk about some of the ways that I use filters in my photography.