Photographing The Southern Night Sky - Part 1

![By NASA's Earth Observatory (Midwestern USA at Night with Aurora Borealis) [CC BY 2.0 (http://creativecommons.org/licenses/by/2.0) or Public domain], via Wikimedia Commons](https://images.squarespace-cdn.com/content/v1/586fc0a6bf629abf69254ce7/1500547272830-G39H4TCE99A6OGHDGGG7/Midwest+USA+at+Night)
By NASA's Earth Observatory (Midwestern USA at Night with Aurora Borealis) [CC BY 2.0 (http://creativecommons.org/licenses/by/2.0) or Public domain], via Wikimedia Commons
TAP TO READ PART 2 - STAR TRAILS
TAP TO READ PART 3 - STAR PANORAMAS
The stars hold a fascination for me and I’ve no doubt that I am not alone! They are the clearest possible indicator that we are part of something much bigger and grander than our own little life. I have no idea what that something is but I do know, simply by looking up, that it is beautiful, rich and worth exploring..
Unfortunately, as many as one-third of the world’s population cannot see the milky way, yep, that is 2.4 billion people! Just think about that for a second and what it means. For millennia the night sky has inspired science and mystics alike. It is a driving force in asserting that both humankind and the Earth are small cogs in an epic galactic wheel. What happens to a person’s worldview when that is taken away? How does it affect them mentally and how does it affect their behaviour, indeed how does it affect them physically!? Perhaps the tragic history of Easter Island offers some insight?
Fabio Falchi, a researcher at the Light Pollution Science and Technology Institute in Thiene, Italy announced the release of a new survey into nighttime sky quality.
Falchi says that “In the first atlas we had a hint of what was happening, but these numbers are shocking. We have lost the connection with our roots, of literature, of philosophy, of science, of religion—all are connected with the contemplation of the night sky. A new generation can no longer appreciate this beauty.”
Light Pollution interferes with as many as 99% of Americans and 83% of Europeans ability to see the stars (forget the Milky Way). When we look up into the night sky in Africa, many of us can still see the incandescent stars and the fiery girdle of the Milky Way. We are lucky but the light is fading for us too. It almost feels like the invisible radiation creeping southwards in Nevil Shute’s novel, ‘On the Beach’ a dark winter, slowly snuffing the lights out, one by one.
For now, in Africa, the stars are still bright and this blog series will show you how to capture them for a posterity that may never see them.
Source: The new world atlas of artifical night sky brightness
Capturing Stars as Points of Light
I spent many of my early years at sea on ocean passages and yacht races. Looking up at the stars during the long and lonely night watches profoundly influenced who I am and what I believe.
I remember a night in the South China Sea, en route to the Philippines in 1991 especially. We were reaching along the edge of a storm, surging down long 8 metre swells at 13knots. Every now and then the peak of a wave would break along the windward rail and shower the watch with silver droplets. Behind us, our wake trailed a bright green luminescence and overhead, the Milky Way arched across the sky, a cathedral of light faintly reflected in the silver surface of the ocean. In the boats’ lee, sheltered from the singing night wind, the starlight caught the gossamer wings of flying fish.
One single night like this is enough soul food for a lifetime.
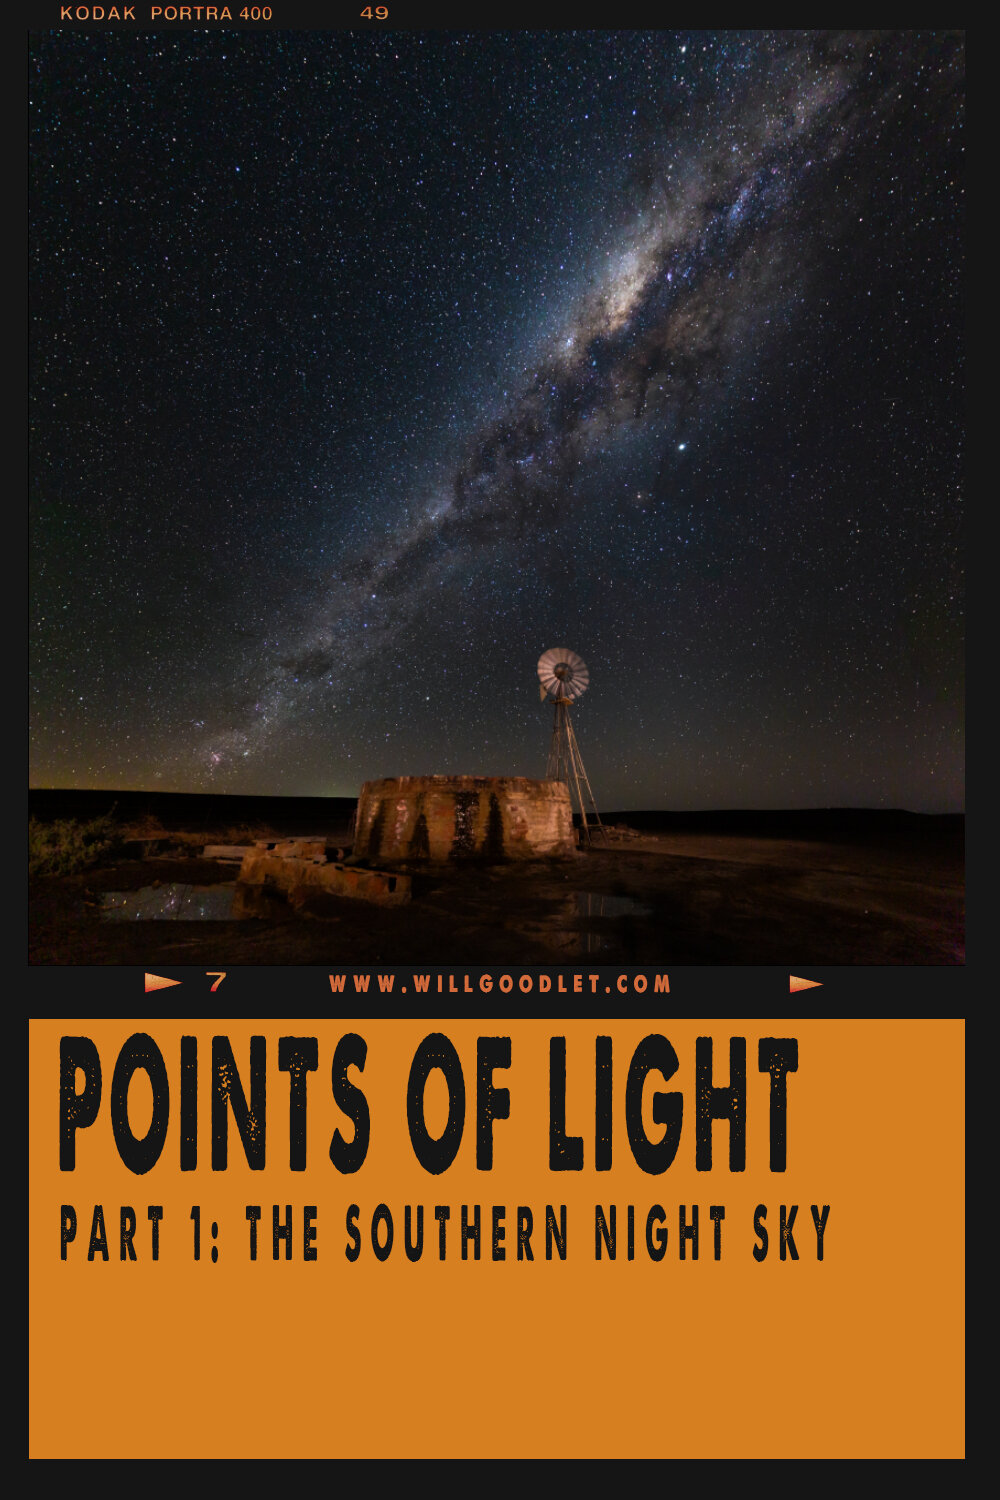
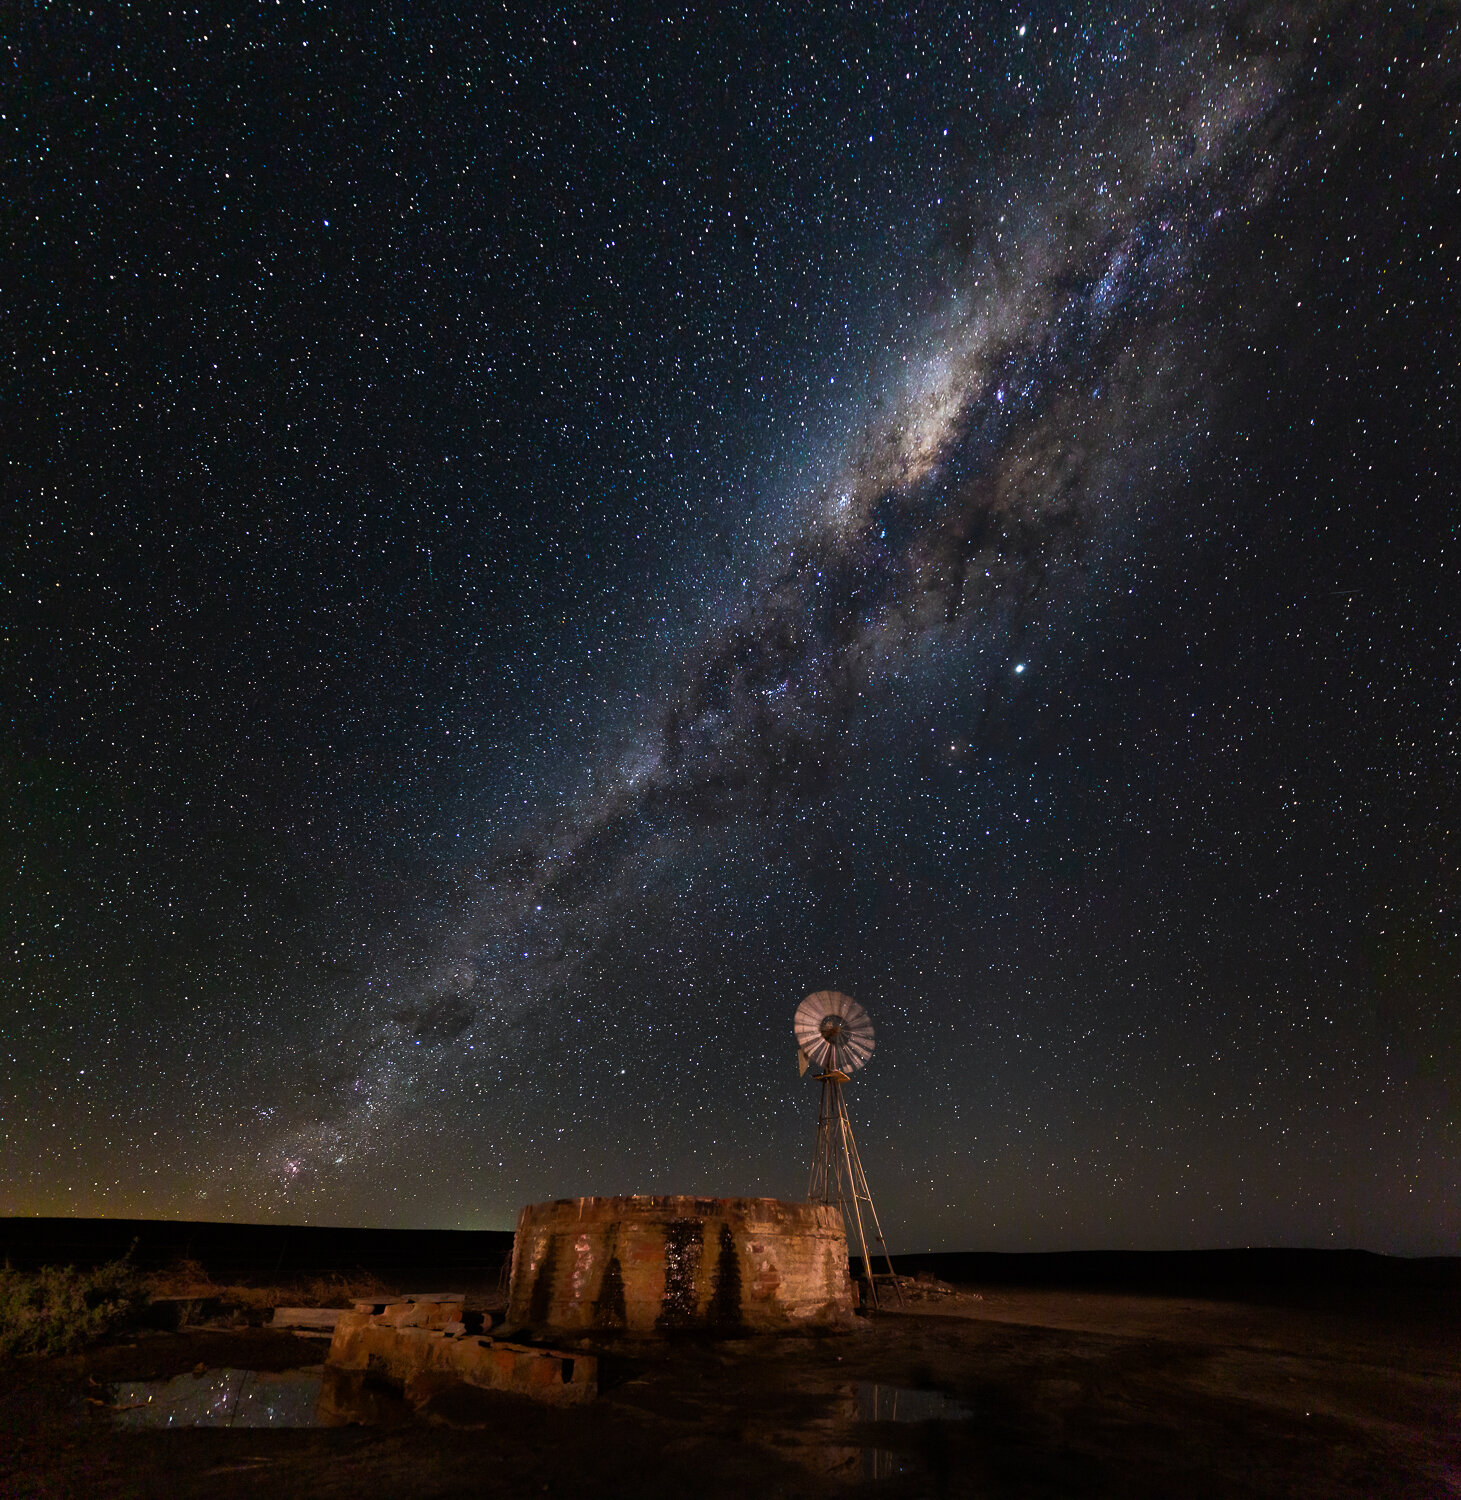
For me, the stars accentuate humility. They dominate any sense of self and substitute one of awe, scale and timelessness. Thinking about that photographically, it is clear that photographing the scale of the night sky almost always requires something small and lonely beneath it to set it off. For me, this small thing is often the camp I have made.
This relationship of scales can also benefit by saying a little about the place of humankind in the cosmos. Something like an old barn, a camp, an abandoned car, a person looking up, a lone tree or rock formation; even a humble telephone pole - all these things work well.

Milky Way at Namibrand nature reserve Namibia. Dark Sky Reserve
I enjoy capturing stars as points of light (SAPL) most. It is quick to accomplish, can be done with most modern DSLR’s and demonstrates scale.
Equipment and settings are relatively straightforward, especially as camera sensors are becoming better and better at coping with extreme dynamic range and the faintest light.
Conditions:
Moonless sky with Bright stars and few clouds.
Limited light pollution from towns and cities (shows up as a yellow glow on the horizon)
Equipment:
A Tripod is essential to hold the shot steady
Manual shutter speed setting (you will need up to 30 seconds)
Manual ISO and Aperture settings
A medium wide angle lens (e.g. 24mm)
A warm incandescent torch or LED lamp with some kind of diffuser (e.g. white plastic bottle cut in half)
Some electrical or duct tape
Technical Challenges:
Focusing in the dark
Lighting the foreground
Avoiding star trailing
Choosing a White Balance
Reducing Noise
Setting up
It’s best to arrive at your location in daylight to avoid any injury stumbling around in the dark. Set up your tripod and focus your camera at an object at least 50m away. When focused, turn off autofocus and carefully tape the focus ring so it cannot move. Check focus is still accurate.
If you haven’t sorted out focus before dark you can also do it by focusing carefully in manual mode on a bright star (or the moon if it is up) at 10x magnification. Once focused, you do not need to change focus again. (nb// If there is an extreme temperature drop, you may need to check your focus again.)
Lighting the Foreground
Lighting is sometimes tricky without a stand, low-level light or another person to help. You can choose to approach it in two ways. Either, use ambient lighting or artificial. Ambient will require you to blend two or more exposures later on, while artificial will allow you to make the shot in one.
It’s generally best to light your foreground subject from quite far back and about 45 degrees off to the right or left. Due to the length of the exposure, you may find you can actually walk off in that direction and flash your foreground briefly with the light. Experiment to find the optimum light-painting technique.
It’s often the case that a very soft, warm and diffuse light will make a much better image than a harsh cool and direct light.

Avoid Star Trailing
Star trails occur when the exposure is long enough to show the movement of the stars in the corner of the image. Obviously, the Earth is rotating all the time, but the length of time it takes to for your pic to show trails depends on the focal length of your lens and your latitude. It also depends on how big your final image will be; the bigger the print, the more evident the trails!
The usual rule for web sized images is (600 / focal length = Seconds) so, for example: 600 / 24mm = 25 seconds exposure.
For large prints, you will need to use a 400 or even a 200 rule: 400/24mm = 17 seconds.
The problem with the shorter exposure time is that it leaves less time for your camera to pick up light. Stacked images or astronomical mounts are generally used to help with this but that is a more advanced topic.
ISO & Aperture for Night Sky Photography
For SAPL images you should be shooting in a RAW format. The high contrast and digital noise of the shot really requires this.
ISO is your camera’s sensitivity or gain dial. You are going to need a high ISO to collect enough light to make your stars visible. A typical value would be ISO 6400 - you can experiment with this. Remember, the lower the value the darker the image but also the better the noise characteristics.
Aperture. This should be set as wide or as close to wide as possible. So, depending on your lens, F1.4, F2, F2.8, F4 or F5.6. If you have a lens with a really wide aperture (like F1.4) you can reduce the ISO by 2 or 3 stops.
Your histogram will indicate what value to use (nb// Do NOT just look at the image on the back of the camera - it will look fine but in reality it will probably be very underexposed!)

Basutho cultural village, Golden Gate Highlands National Park, South Africa.
White Balance for Astrophotography
White balance is an aesthetic choice. In reality choosing a Daylight white balance is the most colour accurate setting (the night sky and milky way is actually a muddy brown and yellow colour). Most photographers tend to select a Tungsten balance which cools the scene drastically. It also desaturates the stars, making them whiter and cooler. This is grossly inaccurate, but often the preferred aesthetic choice. You can read more about this debate in Roger Clark’s excellent article - The colour of the Night Sky
Night Sky Noise Reduction
Noise reduction in Astrophotography is a very complicated and wide subject. For our purposes, we can look at noise during capture and during post-processing.
Noise Reductuction During capture
My advice would be to turn off ‘long exposure noise reduction’ if your camera has this feature. It’s just going to be very frustrating if you leave it on; doubling the length of every exposure.
Another tip would be to dial in the hot pixel profile before the shoot. You won’t find this in the camera manual but on Canon cameras, cleaning the sensor via the menu sets a new hot pixel profile for the current scene. Do it with the lens cap off.
You can leave ‘High ISO noise reduction’ on the medium setting.
Capturing the image in one shot is the easiest method of getting the picture but it is not the brightest and sharpest method. Stacking shots or using an astro-mount/tracker is going to yield better results (especially in built-up and polluted areas) but that, again, is content for a more advanced post.
Noise Reduction During Post Processing
There are so many methods to reduce noise in post processing. Some more advanced than others. I am going to leave this for a subsequent post.
Conclusion
With Stars as Points of Light photography, the cycle time of each image is only between 30 seconds to 2 minutes. So it is a great way to start out. I’d urge you to experiment with exposure and settings to find one that works well for your camera and equipment. Remember to make notes as they will help you the next time you venture out under the stars!
I’d also recommend researching your site and timing as there is no point waiting around all night for an astronomical event or alignment. Rather, try to target the time and the location - be thorough but quick. Then you can go back to bed knowing the shots are in the can.
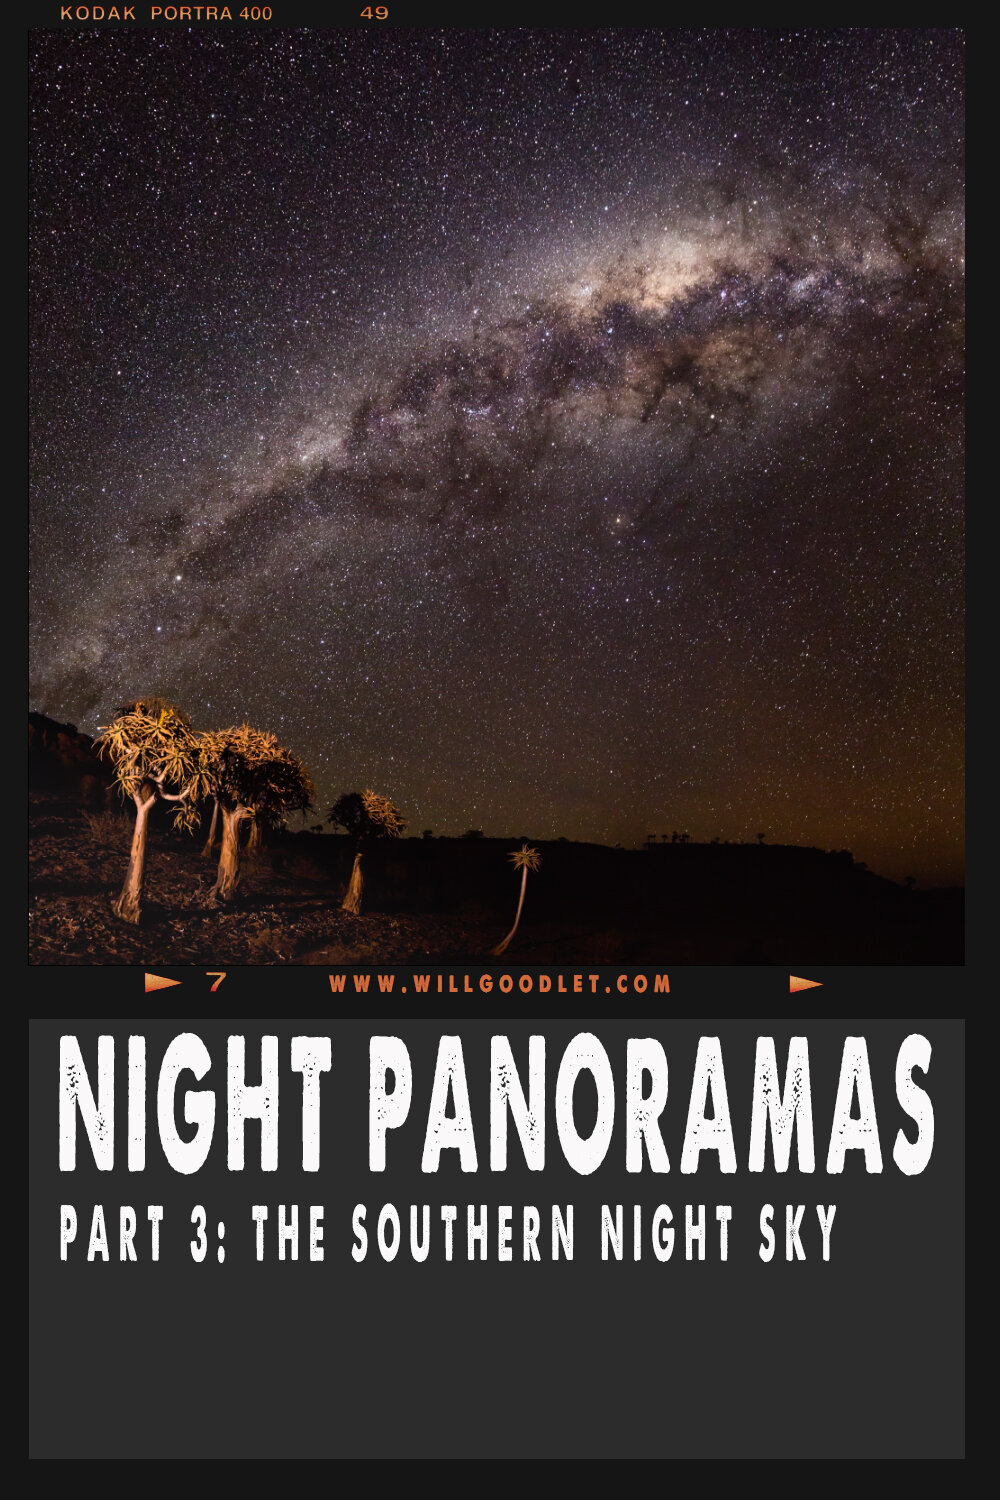
21 images (3 rows of 7) stitched to form a nightscape panorama over the Richtersveld South Africa